
The arrival of a package of etchings from new artwork is always a mix of anticipation and nervous optimism. The nerves arise from the cost and delay from any draughting or logical errors, the anticipation should be self-evident.
The latest etchings for the F were revision B, so the nerves were not acute but the anticipation certainly was, and so it was straight into the test build below.
Version A revealed a couple of easily fixed, but significant errors, plus it revealed some problems with getting everything into (and back out of) the body. That is what test etches are for after all. There were also a number of minor non-essential but desirable tweaks to implement. As a result, version B is far better to put together with a nicer end result. The build below was done in haste to prove the etch, not as a showcase model. It looks pretty nice here, but could be built a lot more tidily. The build did expose the need for version C, but the artwork changes for this are minor and quick.
The images show all the significant etchings assembled for the short frame Neilson built loco. There are quite a few etched detail parts not yet fitted as well as all of the castings. There is most of a day’s relaxed modelling to get to this point.
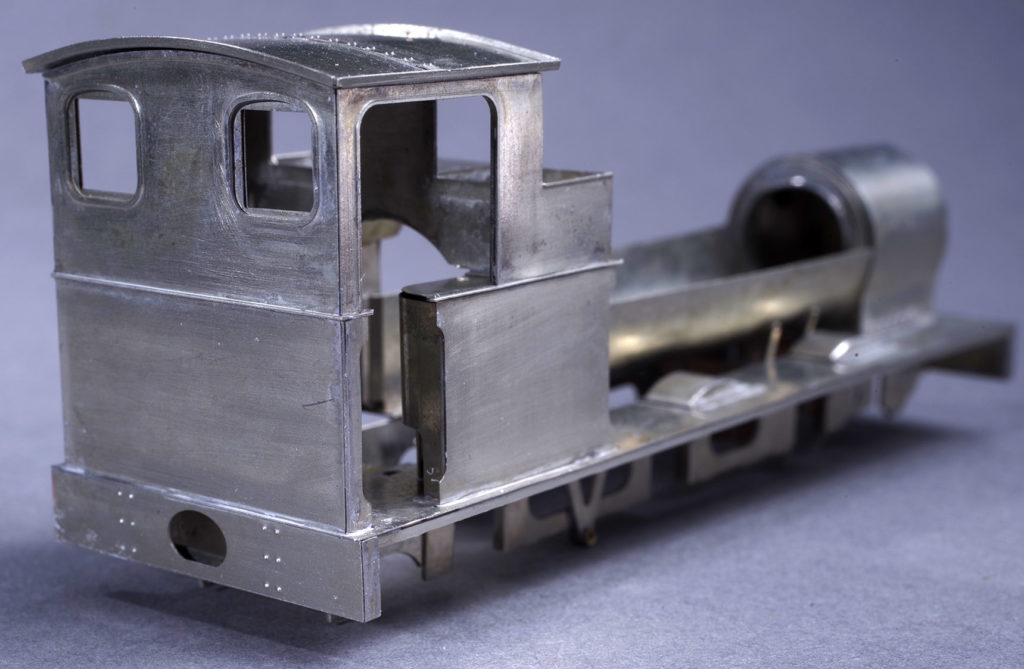
The image above shows how well the etchings fit. Things to note:
- Glazing slots in the window frames
- The appearance of steel over timber headstocks per the prototype – achieved with fold up etched parts.
- A clip on cab roof
- Footplate ‘angle’ provided with jigged installation to make it easy to fit and keep straight.
- Frame ends as part of the body for stiffness, strength and as cowcatcher mounting points
- Nice thin footplate edges, overhanging just the right amount.
And from the front quarter:
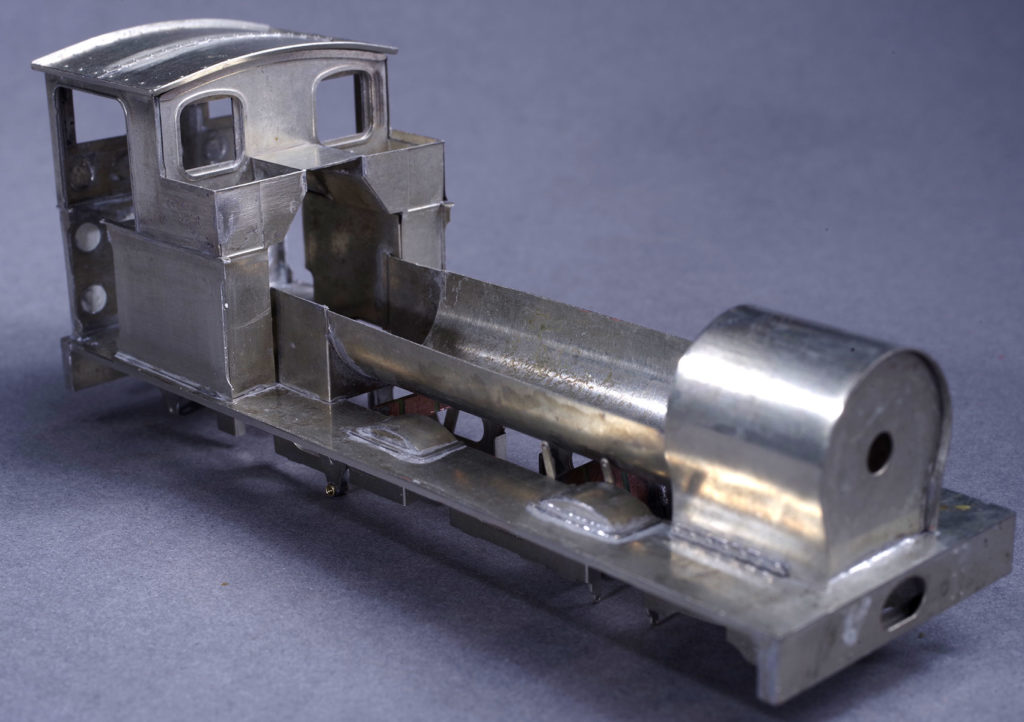
Things to note from this view are:
- Fold and clip splasher construction. Super fine, but not hard to do. Looks a bit messy here, but will clean up well.
- Daylight under the boiler!
- Fold out horns to take the ball races on the drivers
- Compensation uses the prototypical mount and beam (the threaded boss at the bottom of the ‘V’ hanger).
- Nice thin open tops to the bunkers. No need to model these full of coal to cover up deficiencies.
- The white circles in the cab are filler over the holes provided to simplify laminating the cab sheets. Filling is quite successful, but I need to do this step earlier in the construction next time.
There are not too many secrets to building the loco to this point. Most of the tricky bits are either slot/tab or jigged. Many parts are the typical metal oragami exercise that makes construction really straightforward. Where I need to mount things square I generally use a piece of square steel stock and hold the etchings with small magnets. Almost all the soldering work is on the unseen side, so it is not hard to keep the good side looking clean and tidy.
Next up:
- Print and apply the test patterns for the detail castings to prove them and produce some nice images.
- Test build a long frame ‘Dubs’ version.