
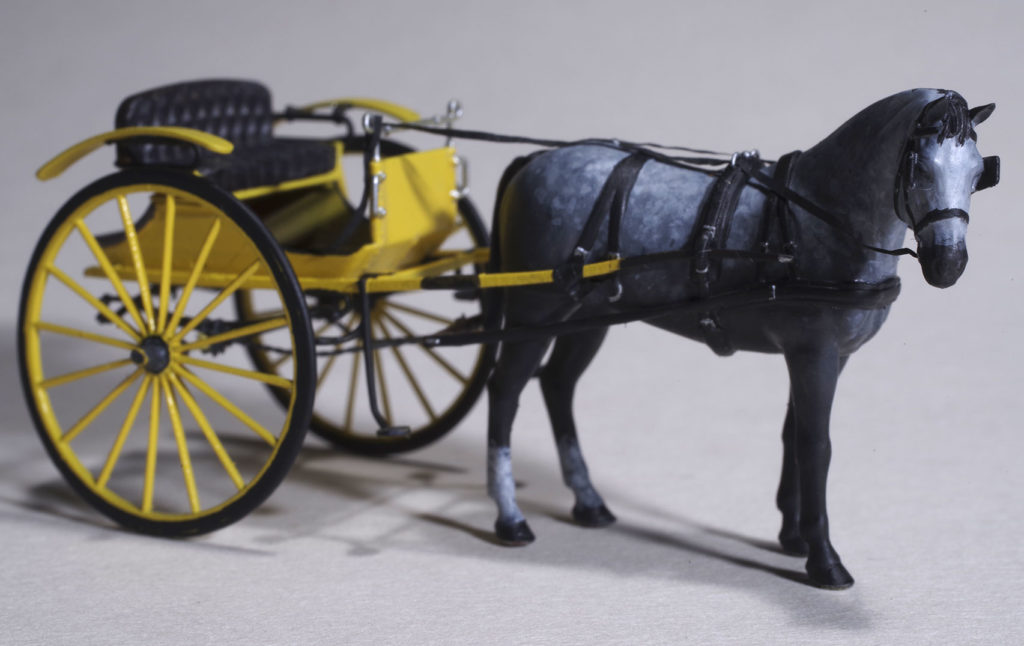
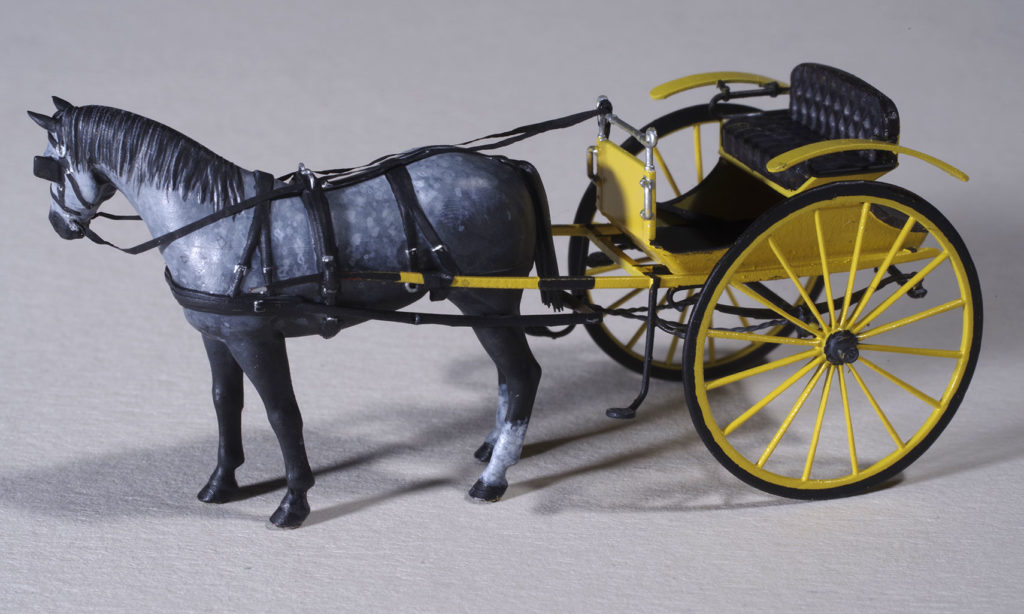
Every product reaches the point where I feel the urge to produce my definitive build, whereupon I move on to other things. Thus it was, and here it is, for the gig. I was rather taken by a photo on the web of a bright yellow gig. This may not be very typical of a period vehicle, but as I don’t really need a gig for the layout that is not an impediment. For a showy gig I needed a flash horse, so I chose to go with a dapple grey. I used the stallion who looks a whole load perkier than the mare – who looks like she’s had a hard day. I went with the blinkered harness too as this seems to be very common, and makes an interesting model.
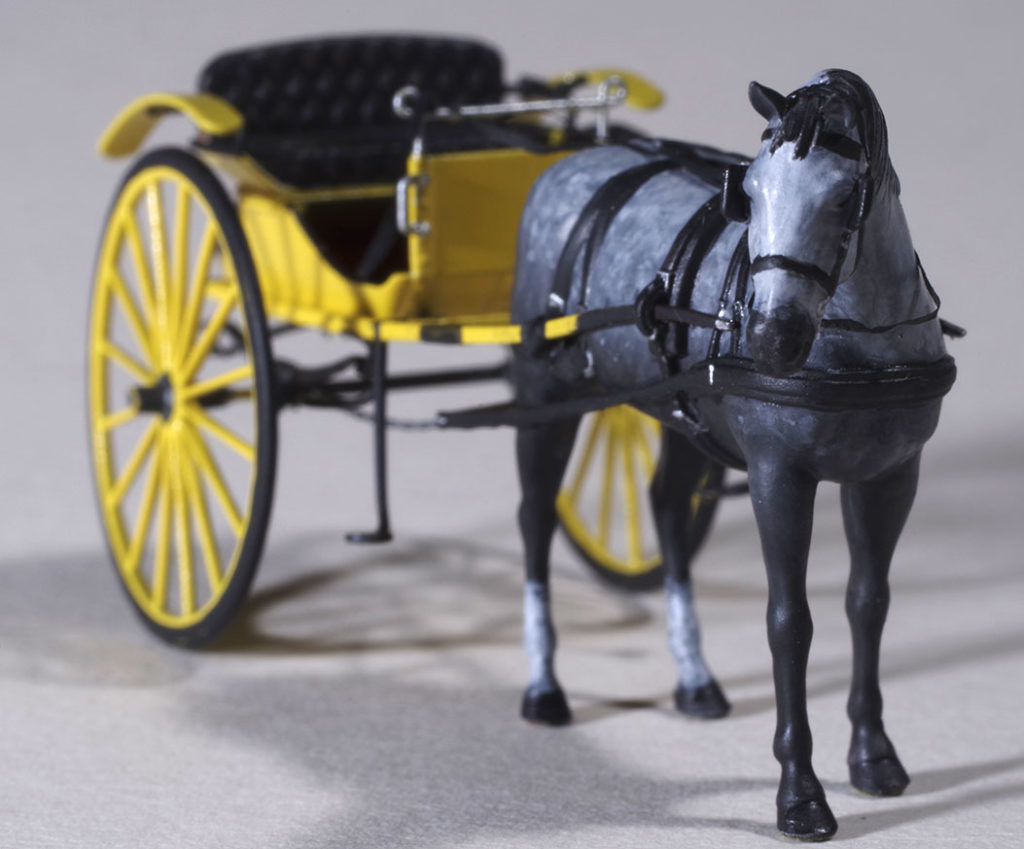
First up a tip of the hat to Mark Andrews, who started this whole saga by presenting me with a file and asking whether it was printable. It was, and while very little of the original now remains, he deserves the credit. The gig as now presented is based on an example preserved at Ferrymead Historic Park in Christchurch.
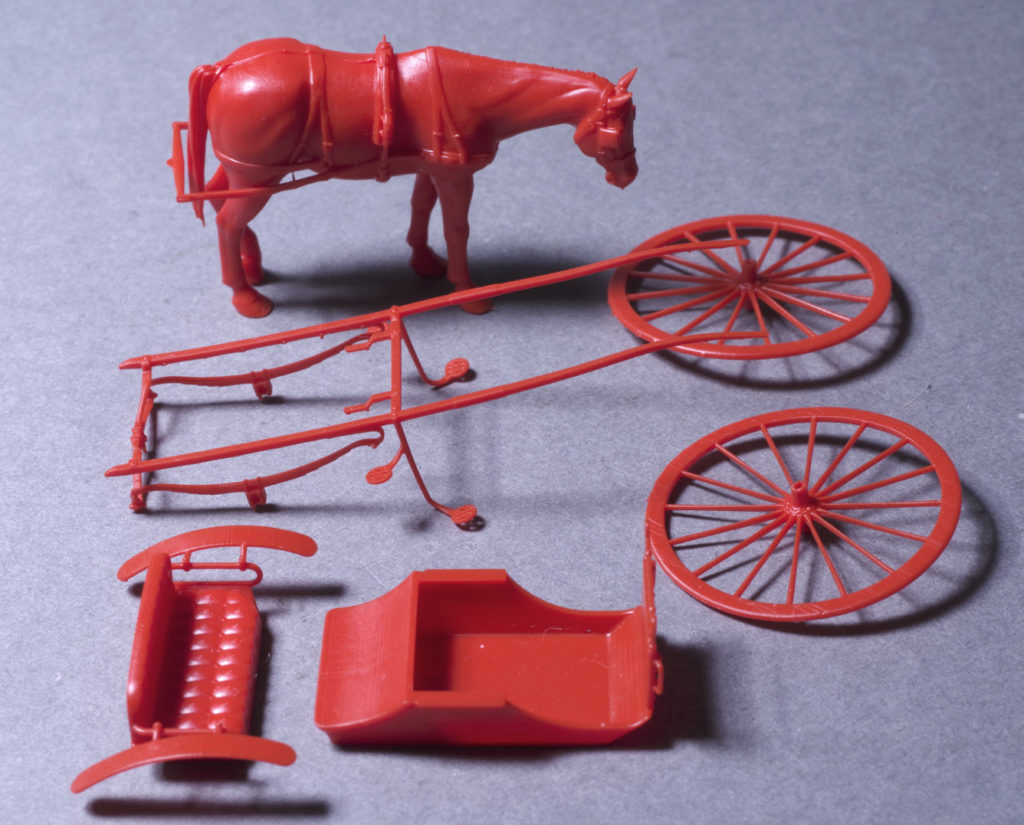
The actual gig build is pretty straightforward and follows the kit instructions. The kit parts are shown above. The wheels are fitted with 0.5mm stub axles and a length of 0.8mm tubing forms the cross member between the springs. This makes it easy to get everything lined up. Parts were mostly painted prior to assembly, which simplified matters considerably. The parts are fine, but not too fragile.
The rims on the wheels were painted using a bow pen fitted to a compass (a made in Czechoslovakia relic of my school days). I did four and used the best two. Concentricity could have been better, and if doing it again I would drill out the hubs to provide location for the compass point. As it is, the inside faces are better than the outer faces. C’est la vie.
I did do a few things not provided in the kit. These are:
- The ‘chains’ that connect the axle-bearing cross member to the singletree
- The breech straps
- Reins
The chains are just twisted 0.2mm copper wire. These are soldered to the extremities of the 0.8mm tube that forms the cross member between the springs and joined at the apex of a triangle leaving a little 0.2mm spigot to clip into the singletree (which is part of the ‘horse’). This is easier to do than write about and doing it as a separate part, off the vehicle, reduces any risk.
The breech straps (the straps that attach to the large rings in front of the horse’s rear legs and wrap around the shafts – taking the load in reversing and braking), are strips of painted tissue paper. I painted a business card size piece black on both sides and allowed to dry. Strips about 0.8mm wide were cut for the straps (using a new scalpel blade), wrapped 2-3 times around the shaft and fixed with matt varnish then allowed to harden. The ends were trimmed back with sharp scissors, allowing enough length for one of them to be glued to the ring on the harness.
Reins used the same tissue cut as thin as possible. The reins are glued into 0.3mm holes drilled at the bit. The painted tissue is quite stiff, but if it needs to conform this can be achieved by wetting it.
The really big job on these projects is painting the horse, which took me around 6 hours on and off. I follow a typical figure painting routine:
- Clean up the model removing any print support scars, filling and sanding if required (it wasn’t here).
- Drill a hole in the horse’s belly and fit a 0.6mm wire attached to a handle to ease manipulation.
- Spray with Vallejo surface primer – and let this harden.
- Browse the web on the iPad for a suitable example to follow. Paint the horse (I used Vallejo acrylic) using fairly thin washes of colour in 3 shades – base, base + and base -. Base +/- being the base colour lightened and darkened respectively. The dark shade is applied to shade areas, undersides and low points and the light shade to highlights. Using washes builds the colour up slowly with a nice smooth result. For the dapple grey I wet areas of the horse and dotted on the various grey shades of the post title. The wet surface means these spread out and ended up nicely diffuse. This whole process is quite time consuming and can be done in a number of sessions.
- White blazes, dark legs and so on can be painted next and washes are effective for this. For the white blazes my paint was less dilute, while the muzzle and legs were done with a thin dark grey wash.
- Next is the harness leather. A good brush and paint of the right consistency are essential for this.
- After the harness I do the buckles and metal work – and I use a microscope and 4-0 brush to do it. If I botch one I take off the paint with a brush dampened with clean water.
- Eyes are carefully placed with the 4-0 brush viewed with the microscope. This is possible even on the blinkered horses.
- Finally I do the mane and tail. I don’t worry too much about the moulded mane, I just paint a large number of fine lines with a little colour variation as I go.
Gig kits and horses to suit are now available for purchase in the Emporuim
Pingback: A gig by Rick – NEW ZEALAND FINESCALE