
Time for a practical post with some tips on soldering up etchings and castings. This is a slightly different exercise than electrical soldering, and the comments here will not be appropriate to rewiring the house.
I’ve always rather liked the idea of 4 stages of learning:
- Unconscious incompetence
- Conscious incompetence
- Conscious competence
- Unconscious competence
It is pretty easy to emerge from the primordial ‘no clue’ stage just by virtue of interest in something. Somewhat harder to progress past stage 2 of knowing what you want, but being unable to achieve it. Once the leap to competence is made the productivity, achievement and fun really start to happen. Knowledge and practice are the way.
This musing was prompted by the building of W238, particularly the soldering together of numerous parts of different mass and material, as well as assemblies that are not always easily reached. For the most part, when it comes to soldering, I like to think I get pretty good results nowadays, but it was not always so. Sometimes considerable thought is still required, but often I am just relying on experience and the confidence that comes from that. So here are some thoughts intended for the competent and incompetent alike…
There are three absolutes in soldering:
- Cleanliness
- Flux
- Heat
To which I would add, for our purposes:
- Not making a mess – minimising clean up
- Not causing any damage or failure to earlier steps.
It’s these latter two points that generally require the most thought. But to basics first. Cleanliness is pretty simple. We need to bond two metal surfaces together with a third metal. If the surfaces are covered in oxides, grease and grot then things will not work well. It is pretty simple, but often neglected. Clean the parts to be joined. I typically use a glass fibre brush for irregular parts or small areas, Scotchbrite for large flat areas. Keeping things clean between steps helps too, as does a thorough clean at the end of each session.
The purpose of flux is to assist in cleaning the metal, and assist in making the solder wet the surfaces and to flow. I confess I do not use flux as such anymore. I almost always use Carr’s 188 solder paint, which admittedly contains flux as a constituent. I find the creamy consistency quite good for staying put. It does a good job and the flux washes off well with soapy water. In many cases there is no need to add additional solder either but, if extra is needed, it is no problem to do so. If you add too much paint, it is easy to clean off BEFORE applying the heat. It is very controllable too, and rather hard to overdo it on the volume front. Once the flux has boiled off the volume of solder remaining is much smaller than the original amount of solder paint.
Getting heat into the job, suffcient to fully heat the areas to be joined and melt the solder, is critical. This needs to happen before the heat spreads out to burn fingers or damage earlier work. If using an iron (as we typically, but not always, do) there are three features that are important. Firstly, how much heat the tip holds (tip size and temperature). Secondly, how efficiently this is transferred to the work (tip shape and wetting). Thirdly, how well the tip temperature is maintained (wattage). The idea is to be able to quickly heat the area of the joint to the melting point of the solder. It is important to be able to get heat in much faster than the the energy is conducted away through the workpiece. If you need to leave the iron on the work for more than 2-3 seconds, that suggests you probably need another approach.
Another factor crucial to a reliably good job is a means to ensure the parts are soldered up in the desired orientation. More on this below.
My iron of choice is a 48W 24V Weller of considerable vintage. Temperature control is by interchangable tips. My favourite is an 800°F (425°C) fine tip – but I have others. This one is good for attaching detail castings though. Cool, under-powered irons with dirty tips will not easily achieve good results. Likewise a fat tip that cannot effectively make contact with the joint area is unlikely to be successful.
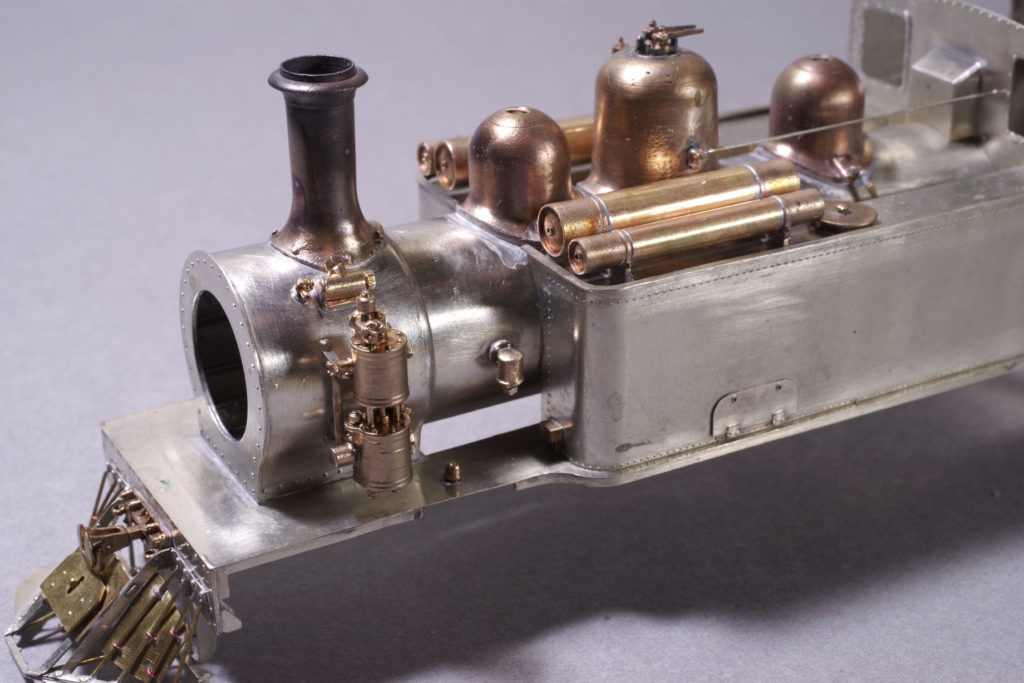
W238 with castings freshly fitted
With the boiler fittings, the first thing was to drill out all of the pipe unions, so that when the time comes for connecting pipework it will be much easier and the joints far stronger. I do this before removing castings from their sprues.
To fit the silencer, clack valves and blower fitting, I used the spigot on the castings fitted into suitable holes drilled into the boiler/smokebox. These were not overly sloppy, nor tight. A bit of clearance allows the solder to flow into the joint. The part was then clamped in place with an aluminium hairslide, suitably distorted to ensure the clamping was snug and reliable. The solder paint was then applied to the inside of the smokebox/boiler using a piece of fine wire. This was not precise – it’s the inside after all. I then wetted the heated iron described above with Carr’s 179 solder (although I have results as good with ordinary 60/40 electronic solder too), and touched the angle between sheetmetal and spigot inside the boiler/smokebox for a second or so. There’s a fizz, and the solder runs nicely. None of the joints needed any solder clean up, although they did get a good wash with liquid soap followed by a thorough rinse.
The brake pump was more of a challenge. Firstly the cast pump mount was cleaned up so it was true and flat. It was then soldered to the etched bracket. In this case I used the resistance soldering iron – mainly because this allows me to hold the part and apply the heat in the same action. It would have been easy enough with my standard set up (as above), but some form of clamp would have been needed.
Once the pump was on the mounting bracket the smokebox was drilled to suit and 0.5mm pins inserted to represent the mounting bolts and to reinforce the joint. Pins were left as long as possible inside the smokebox. Thereafter I proceeded as for the valves above, and again no need for any solder clean up. The pins were cut back after soldering.
This is the procedure for the majority of jobs where relatively small detail parts are being added to the relatively large model. Key points are: Wherever possible pins or spigots in holes are used to provide positive location and strength (If you only have to worry about the soldering, confident the parts are correctly aligned, the stress is considerably less). A hot iron applied quickly to a joint that is wetted, to ensure good heat transfer. Where possible using the iron in a location that will be invisible. If soldering from behind is not possible, the solder paint gives a much better chance of a relatively clean result compared to a conventional flux/solder combination.
Let me know if these tip style posts are useful or not. Suggestions for blog topics always welcome.
Lawrence
2 comments