
In the last post I outlined an ambitious car building programme. In this installment progress is outlined…
One thing I didn’t cover last time was the ‘how?’. It’s one thing to write a to do list, another thing entirely to realise it in a timely fashion. Followers of the blog will not be surprised to learn that the approach I’ve taken is a digital/3D print route. There are many reasons for this, but chief amongst them is that while the cars are diverse, there are common elements within and between them so a lot of time can be saved. Secondly these will be released as kits, so a viable way of producing them in volume is needed.
I started (much like the NZR did) with the BP91 43′ cars. I plan on running at least three: A40 (centre lavatory, wide board car with simplified mouldings and clerestory roof), A161 (end lavatory, ~2″ T&G sheathing, original mouldings and elevated roof) and A214 (centre lavatory, ~3″ T&G, simplified mouldings with turtleback roof). The cars have other subtle detail differences as well, but much is similar.
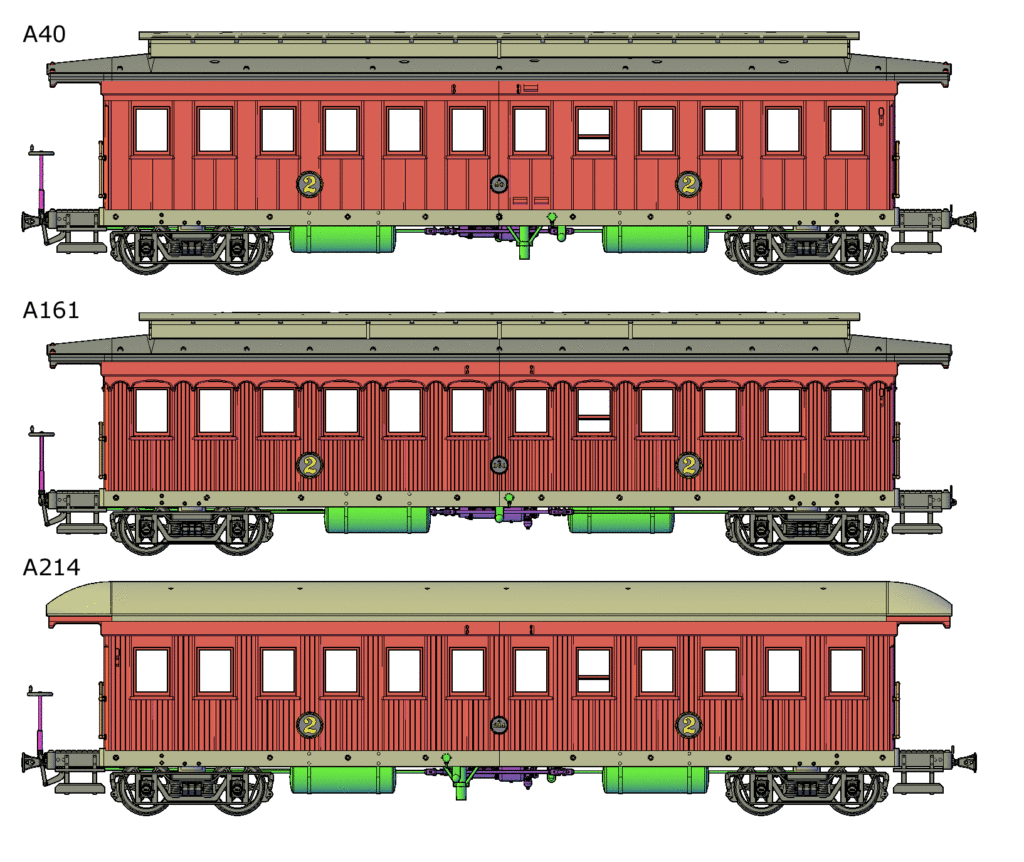
Line art for the three BP91 cars based on the 3D models for the kits. At this point modelling for things like gates and ventilators hasn’t been done.
One difficulty with these cars is that the original drawings are very low on detail and dimensions. The final result is a good match for photos and the drawings that do exist, but the process to get there was somewhat more arduous than it will be for later cars that are better documented. I started with A161 and it took weeks. On the plus side A214 emerged in little more than a morning.
In terms of design, I wanted to get well away from the traditional NZR car kit. There have been some great models made from these, but they are not easy. So my approach was to aim for something that will be inherently square – a one piece body. Onto this will be assembled parts that truely fit using screws, pins and locating tags.
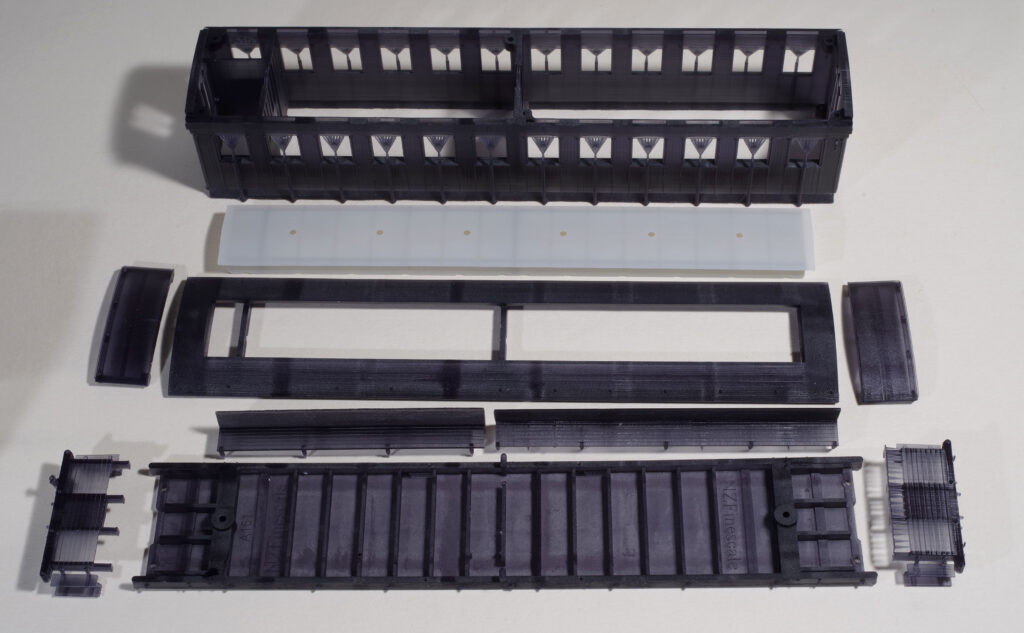
The basic kit parts for A161 (and similar cars). Some of the print supports have yet to be removed. Also not shown are the few detail castings, etched gates and etched window frames that will fit into the slots in the body – They’ll all be able to slide open. All these cars had longitudinal, all 2nd seating and this is also supplied.
So are these 3D prints any good?
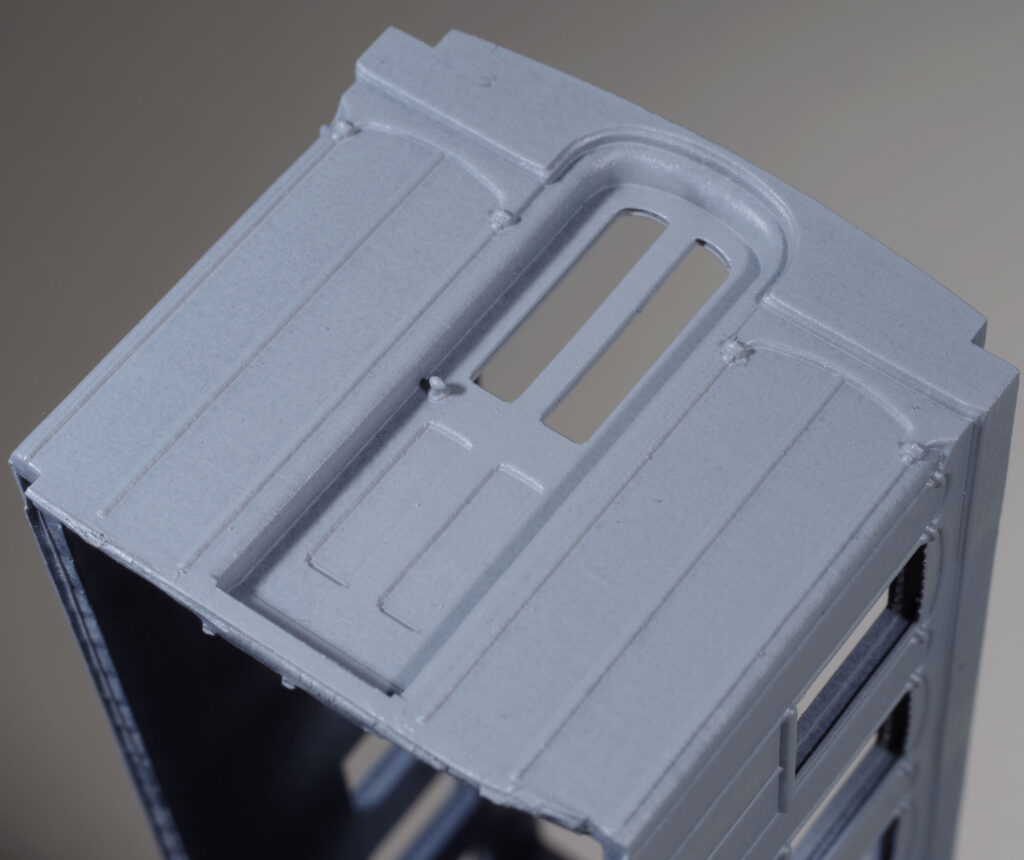
In this (and the following) image the part has been sprayed with a thin coat of etch primer. This is no surface primer to hide blemishes, it is just to provide an opaque and even tone to allow the model to be better assessed. This is an early test print too – so not perfect to start with. Detail level is sharp and there is little visible evidence that this is a 3D print. The door has a slot to fit glazing within.
I’ve tried to add as much detail as possible into the basic printed parts. This really simplifies the build, but does mean that the parts are not neccesarily easy to adapt to suit other arrangements. However, there is no reason why this cannot be done digitally to produce a kit for a BP91 car not covered by these examples.
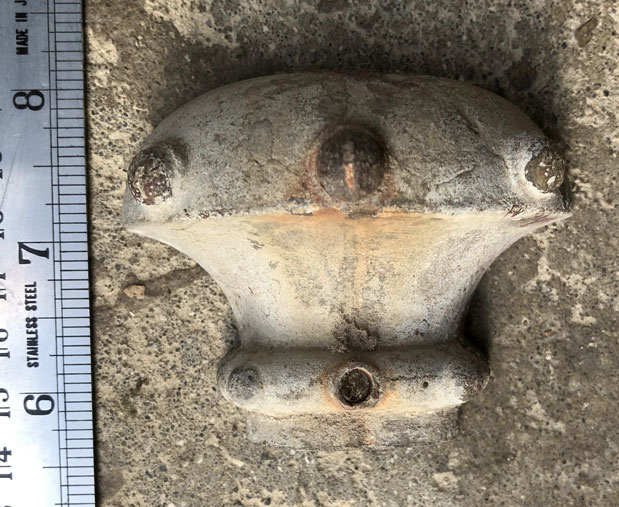
This (courtesy of Kevin Crosado) is what the little cast acorns on the mouldings should look like.
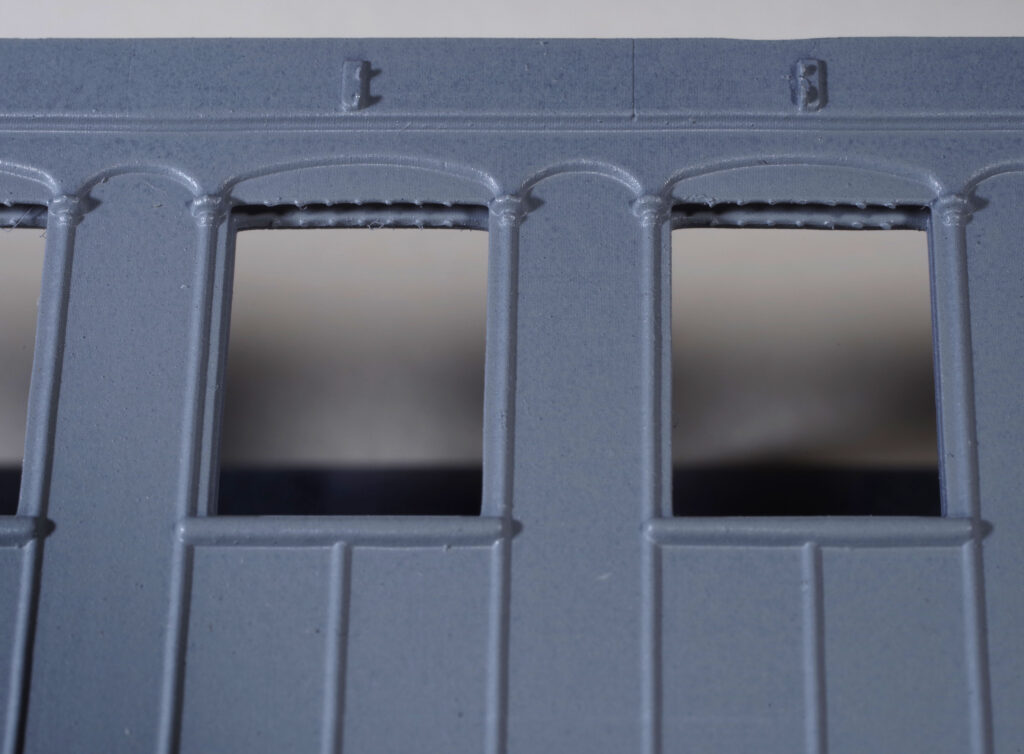
In this enlargement of the car side (no clean up has been done here), the acorns are not only clearly visible, but the small ‘warts’ have also resolved. The individual pixels from the printer are visible but these are 50 micon square – well below what is visible without significant magnification. This slightly rough surface will be further smoothed by subsequent paint layers.
Detail level is only half the story though. The parts are also accurate, square and fit together with very little clean up. While I have not gone for a fully modelled inerior the partitions and internal doors are modelled and proper seats supplied. So the interior will look good when viewed through the windows without increasing the kit difficulty or cost.
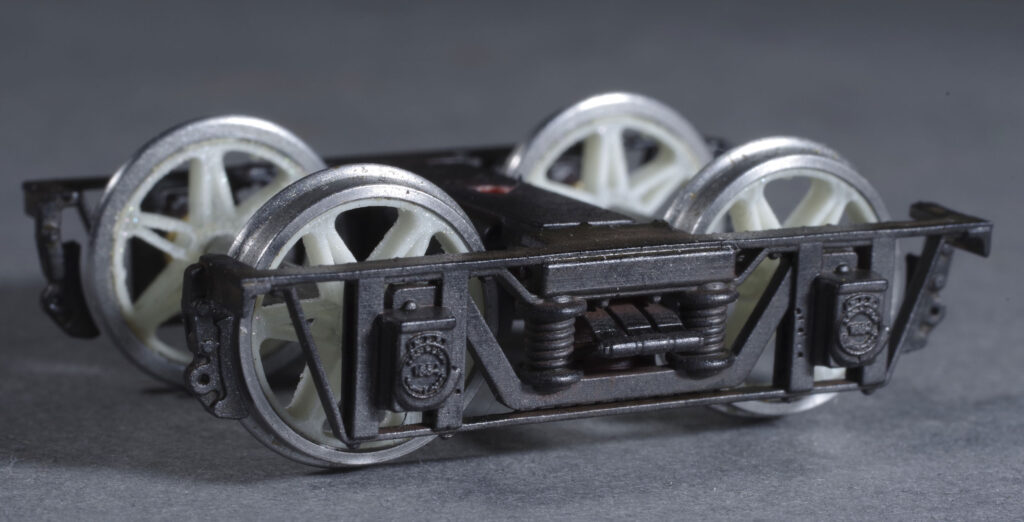
Shown here with scale wheels, all of these cars ran on B60 Addington bogies (as well as others that will also be available). These bogies are fully compensated resin prints that simply clip together. While quite light, when mated to the 3D printed cars they are more than robust enough for the job and run freely. The compensation works extremey well and the vehicle will pass over significant lumps on the track without much of a jolt.
So there you have it. Really nice looking cars without a lot of heartache. Over the next few weeks I’ll be building and painting these as test builds for instruction writing and to make sure there are no serious hardships to overcome. The etched windows will be a while to come through in volume, so actual kit release will still be a couple of months away.
If BP91 cars are your thing please get in touch. I cannot promise to produce your favourite car, but it may be possible.