
Interesting times here at NZF, where we’ve been reminded yet again of the pace of technology change. The trusty Solus 3d printer that we’ve been churning out casting patterns on for a few years has died, and been replaced with something higher resolution, faster and cheaper.
While that has been going on, production of parts has been on hold which has provided an opportunity to dabble and experiment with some other things…
One tenet of (particularly US) scale modelling that I’ve often challenged is the idea that ‘nothing looks more like wood than wood’. In 1:64 this is often not true as timber in good condition has little relief and so styrene or metal can represent such timber adequately. Any required grain can be simulated by surface treatment . For large, weathered timber (such as bridge timbers), it is true that basswood and similar timbers can work well, although knots are hard to do.
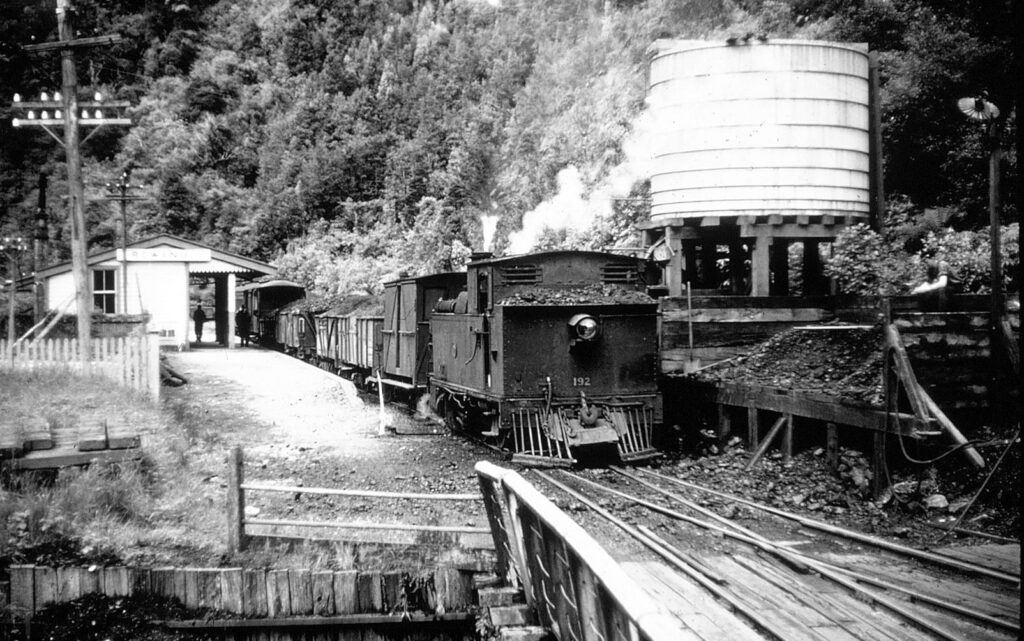
For my own modelling I’ve been working on the Rewanui water vat and coal stage more or less as shown in the Jack Creber photo below. As can be seen from the photo the structure of the vat is in fairly good condition and thus there is no need to attempt to model grain for this. The coal stage is a completely different matter. Timber here is well weathered and distressed by the cycles of loading and loco coaling.
So how to represent this?
Certainly a scratchbuild in basswood would be possible. Timber could be distressed and given relief, but to actually model the grain visible in the picure above would be difficult. It’s worth considering how much actual scale relief there would be in this highly visible grain. Probably very little – 1/8″ would be a lot and that is only 0.05mm in 1/64. However, we might get away with overdoing it a bit so that the final painting step has relief to catch washes, dry brushing, powders or whatever else might get chucked at it.
0.05mm does not sound like a lot, but it’s the resolution of my large printer, so I wondered if I could print timbers with grain.
In embarking on models these days, I generally draw them in 3D, particularly if working from photos and original drawings are not available (as here). This allows me to see what the model will look like on screen and to tweak the look. This sort of work is inevitably done in a CAD package, and I stuck to that approach here initially as well. The stage is a very simple structure, but I was guessing on dimensions and hidden details, so by modelling the members individually these could be moved and adjusted until I had something that matched the available images. However, CAD is generally not that good at adding textures and the kind of twisting, sagging and warping that the coal stage timbers really needed. For this type of drawing one of the more organic modelling packages is better suited, and Blender is my go to for this.
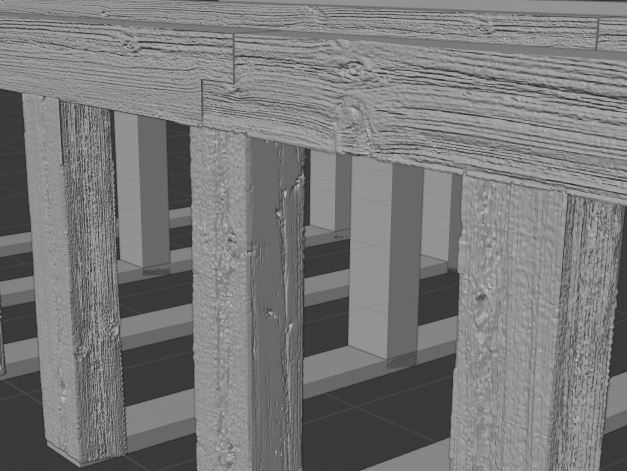
Software like Blender allows photographic data to be projected onto surfaces in 3d relief. So each timber can have unique grain placed on it. In addition, it is easy to twist and warp timbers. This is all quite a bit slower to do than a simple CAD drawing and the resulting files are relatively huge – but it isn’t hard. Finding grain patterns that I liked online was really easy by searching images of ‘weathered timber’.
But does it work? I didn’t rush into a complete model to test this of course. There were a couple of test pieces first, but these were very encouraging. So moving to the real test, here’s the area shown above printed out.
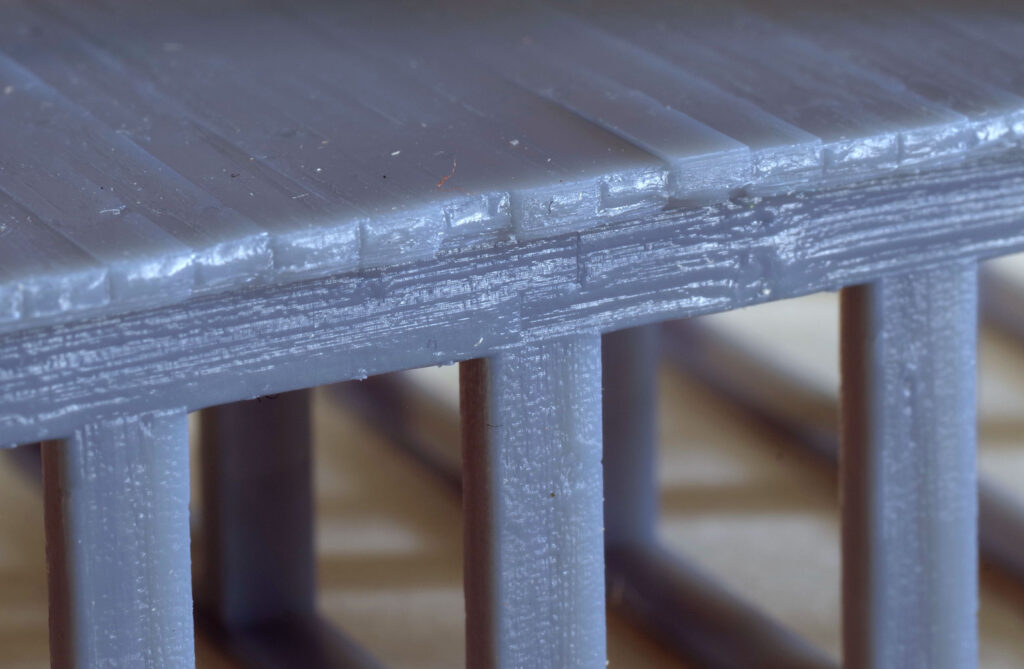
Bearing in mind that the main timbers in this view are a scale 8″, or 3.2mm across, there is an awful lot of resolved grain detail. Yes, some of it is excessive in terms of scale depth, but this is not obvious at lower magnification. As hoped for, there is plenty here to enable surface finishing to pick up realistic grain detail. Notice also the subtle twists and warps in the deck timbers. In hindsight I could probably have distressed things a little more but on the other hand things were not too run down in the 1940 period, so maybe discretion is the better approach after all.

So this is the inside side wall of the stage after priming grey and a simple enamel wash. Remember the boards are only 3.2mm high. At this stage I’m still exploring things and this is as far as I have got. The next step is to complete the model and paint it properly, but suffice to say I think I’m on a winner with this technique.