
If you are modelling the New Zealand scene then there’s a good chance you could, or maybe should, incorporate some tree ferns into your modelling. Not only are they common in the wild but they are also cultivated as ornamentals in gardens. Modelling characteristic foliage is a good way to place a layout or diorama into its geographic context. Even a few ferns amongst the trees will suggest a much more New Zealand feel to a scene. I’ve had some pretty positive feedback on my ‘pongas’, so in this post I describe how I make these characteristic plants in 1:64.
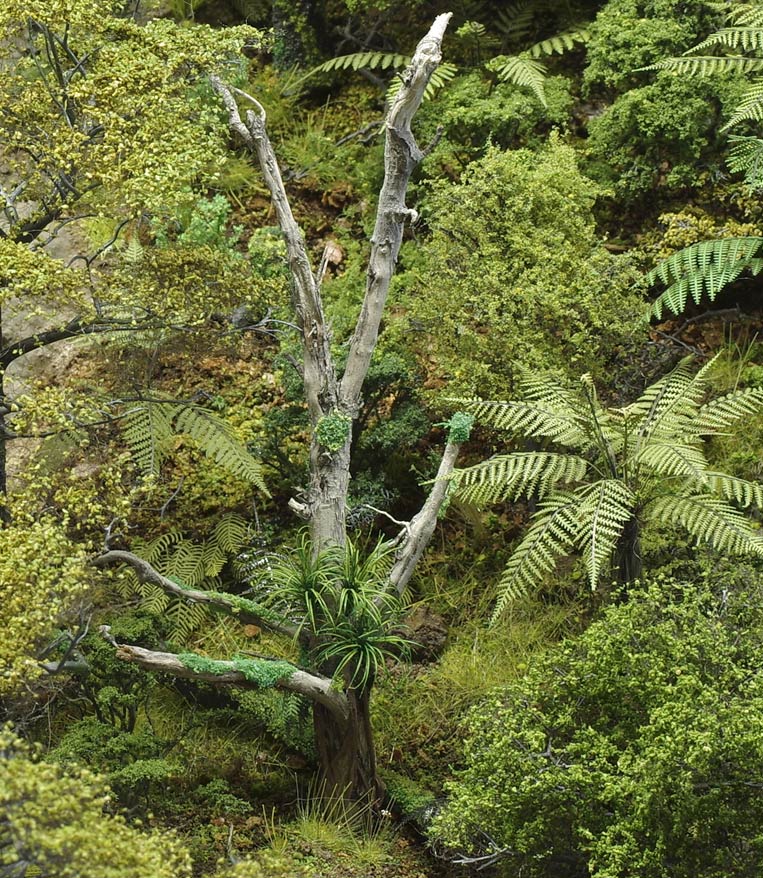
A cameo with a prominent Wheki from the gorge on my Rewanui layout.
There are five common tree ferns in New Zealand. These all have fairly wide distributions, but are not found everywhere, so it pays to check which species are appropriate before getting carried away. From a modelling perspective the differences between them comes down to size, trunk characteristics and the presence/form of a skirt of dead fronds below the crown. The table briefly summarises the differences between the species and the Internet can furnish any further details that might be needed. The Te Papa website has an easy guide.
| Maori and common name | Mamaku
(Black/king fern) |
Ponga
(Silver fern) |
Katote | Wheki | Wheki ponga |
| Latin name | Cyathea medullaris | Cyathea dealbata | Cyathea smithii | Dicksonia squarrosa | Dicksonia fibrosa |
| Height | Up to 20m | Up to 12m | Up to 8m | Up to 7m | Up to 6m |
| Comments | Substantial frond bases and large fronds | Characteristic white/silver underside to fronds | |||
| ‘Skirt’ | Occasionally present to a limited extent. | Variable | Present, consisting of main ribs only | Scruffy dead fronds may be present but not as a consistent skirt | Present, consisting of entire fronds |
| Trunk | Smooth with hexagonal frond scars | Dark brown with prominent frond stumps | Relatively smooth | Dark brown black with prominent frond stumps | Smooth |
The all encompassing term ‘punga’, while still common, is apparently a mispronunciation/poor transliteration of ‘ponga’.
In terms of height, while the Mamaku can grow to 20m (over 300 mm in 1:64), most will be quite a bit smaller. Pragmatically, trees normally need to be modelled under scale and tree ferns are no exception. As always it pays to use photos as a guide. Tree ferns vary quite a bit depending on their location, like all plants.
As with most modelling there is no ‘right’ way to model ferns. The choice of method will depend on scale, budget (cash and time), and the level of realism sought. My method yields quite convincing plants. It is not difficult, but is a bit intensive. Without doubt this is one of those modelling tasks best done in a batch. It uses etched phosphor bronze fronds so is not the cheapest method. Kits to make tree ferns are available in the Emporium. For 1:64 it does give a robust, detailed plant. In smaller scales it may be impractical and in larger scales cost-prohibitive. Laser cut paper and reworked plastic palm trees are alternatives, but they do not quite capture the real thing as well as this method. Whatever technique is used, hopefully something here will be handy for you.
The trunk.
My latest ferns all have 3D printed trunks (and kits are supplied with these). They are not hard to draw up (in software such as Blender) and can be easily printed in large numbers. While natural materials could be used, a 3d printed trunk can show the prominent frond stumps of the Wheki or the hexagonal frond scars of the Mamaku to perfection. It is also pretty easy to model the elbow shaped base that commonly forms when these plants are growing on a slope. If you can live without the characteristic trunk surfaces, a suitable twig or distressed dowel will suffice.
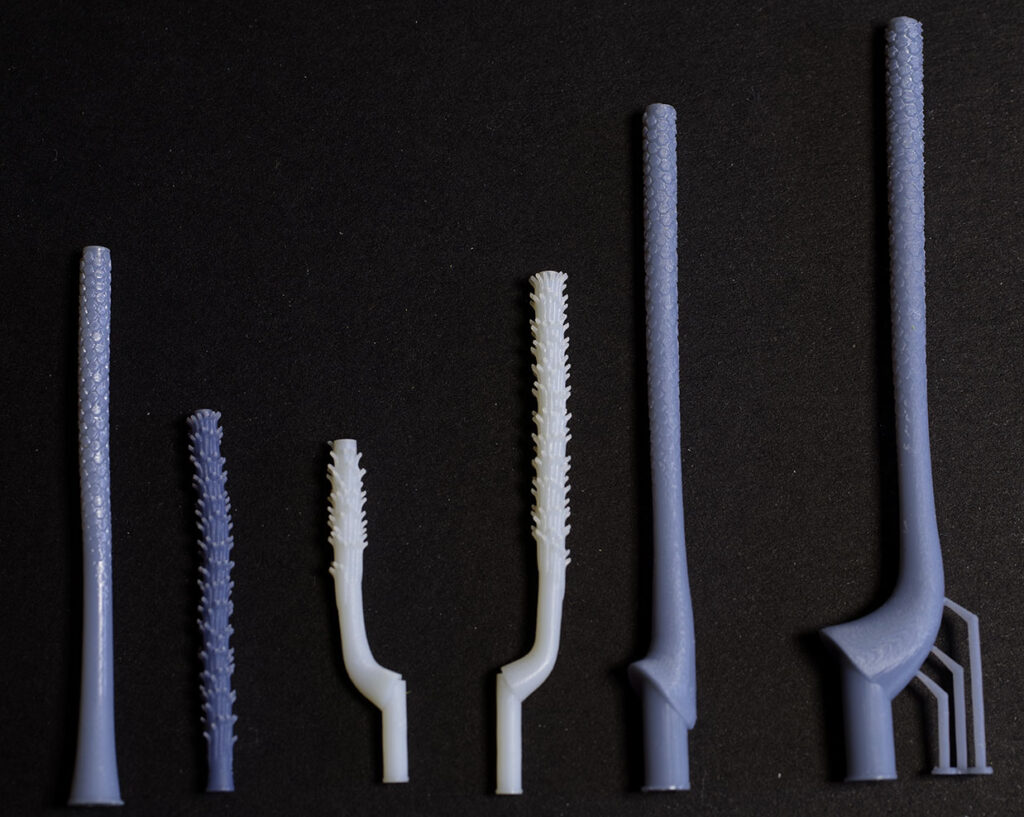
A range of printed trunks, to different designs and in various resins, as they come off the printer.
I drill out the base of the trunk and fit a substantial wire to use as a handle during construction and as a mounting peg on completion. I fit a wire, matched to the etched holes in the fronds, at the top of the trunk to mount the fronds to. This is cut to length and the end chamfered to aid fitting the fronds. It really helps if this is a tight fit to the holes in the etched frond bases as assembly is much easier if you can just push fit fronds on and they stay put without further effort. I leave painting the trunk until later. It can be done at this point, and should be if there is a prominent skirt fitted, but the frond bases will need touching up after fitting so it pays to leave painting the trunk if possible.
The crown.
As noted above the fronds are etched in phosphor bronze (0.15mm). This is quite tough, but easily formed. Etching in this thin material allows more detail than is possible/practical by laser cutting.
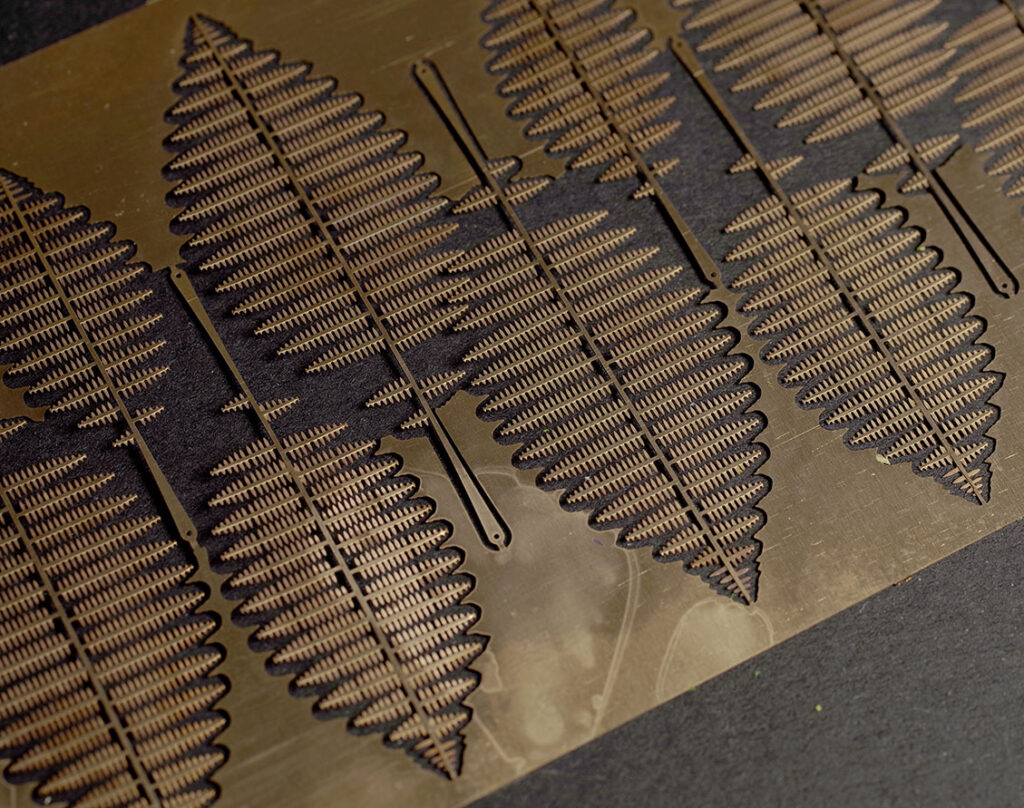
Part of the Mamaku etch, as it comes in raw phosphor bronze.

Part of the Wheki etch, with fronds pre-painted and ready to be removed from the fret.
I prime and paint (spray) the fronds before removing from the fret. The upper and lower surfaces will be different shades (markedly so for silver ferns). It is also easy to vary the shades of the fronds a bit while they are still in the flat and in one piece. This painting approach introduces some variation that tends to add to the realism. Once the paint is dry I use a fine marker to colour the main ribs. Once this is done the fronds can all be cut from the fret. I use a knife on a firm board to do this. It is not hard, but a bit mind-numbing. An ideal task to do while listening to music or other distracting activity.
To form the fronds I first adjust the shape if required. This ranges from straightening the main rib to adjusting the angles of the frondlets to the central rib. Really just massaging the frond to the required shape with finger pressure. Next, I form the droop of the frondlets by gently pressing to shape over a suitable former – typically a pencil or biro.
Finally, I grasp the frond base in a pair of flat jaw pliers and bend to the angle that I want the frond to emerge at. The overall drape of the frond can then easily be formed with finger pressure. The phosphor bronze is easy to shape (and reshape if needed), but retains its form very well against any inadvertent rough handling. This is a key advantage compared to brass or paper.
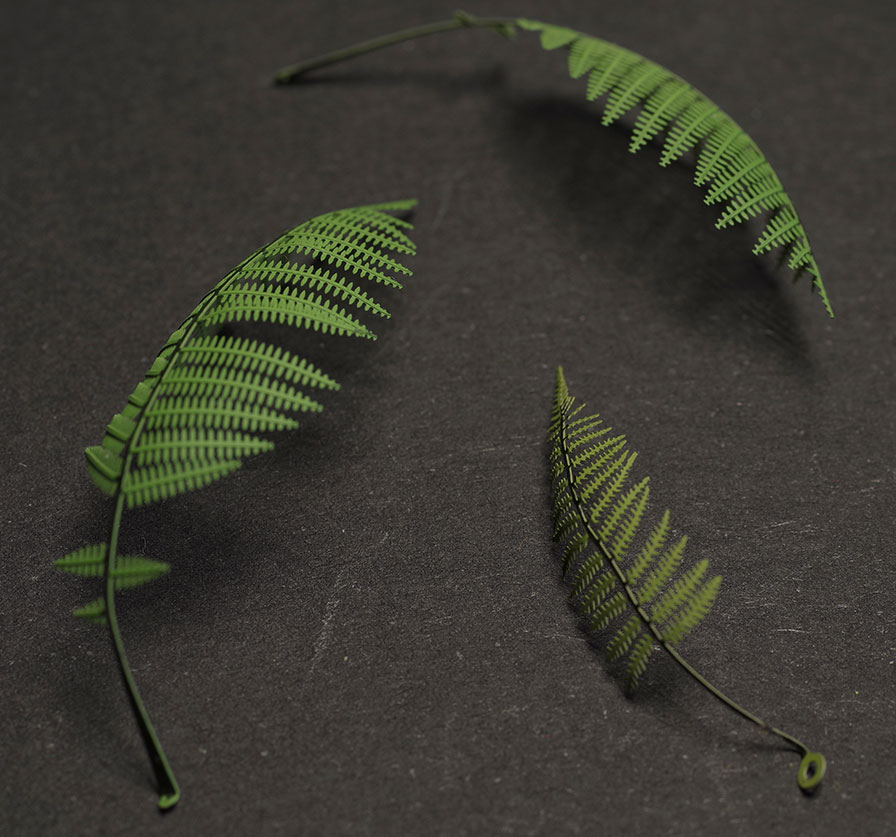
Fronds formed up as described and ready to mount on trunks. The two larger fronds are from the ‘Mamaku’ etch while the smaller is from the ‘Wheki’ etch.
The fronds are then fitted to the trunk one at a time. I find that I can usually slip each frond over the wire peg sufficient for it to stay put. It can then be pressed home using a short length of suitable metal tube (1.2-1.5mm bore). It is important to note that the fronds generally arise around the edge of the trunk at a steep angle. If you plan on modelling dead fronds, then these need to be added first.
I generally finish with some small fronds rolled to simulate the koru (young developing frond). All of this is then held in place by applying some low viscosity superglue to the frond stack.
Bear in mind that tree ferns growing naturally will often be quite unkempt, so it pays to model them in less than perfect condition if realism is the goal. Specimen plants are impressive and fun to make though.
Painting interlude
At this point I typically paint the trunk and the base of the crown taking care to cover any bare metal. I just do the base colour at this point, which is black/ grey/brown. Exposed trunks in drier, exposed locales tend to pale grey/brown, while trunks in sheltered moist locations are typically much darker and not uncommonly will be festooned with moss and other small plants.
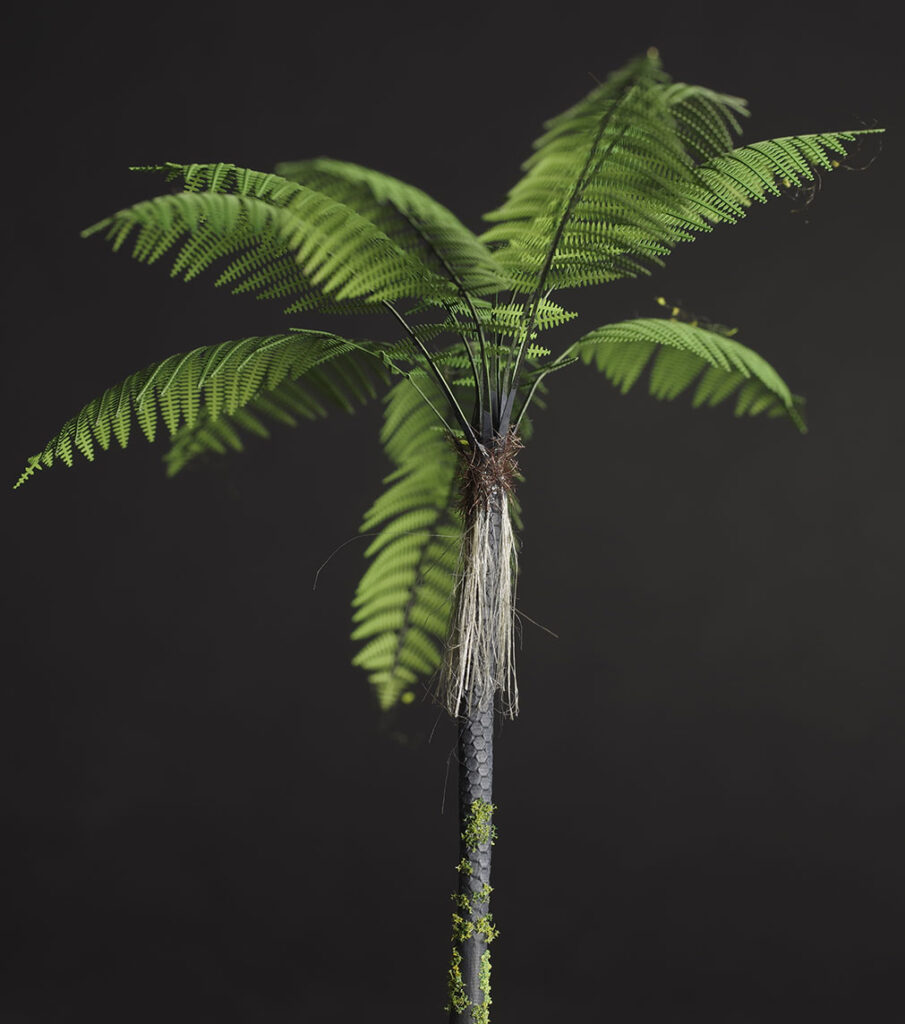
With my early efforts I was quite disappointed with the trunk top. While not super-obvious, the stacked metal frond bases were apparent on close inspection and not at all realistic. My solution is to apply PVA glue to this area and sprinkle on short staple (<3mm) dark brown static fibres. While by no means scale, these give the impression of the very hairy prototype and fully disguise the layered metal. It is a bit of a fudge, but it works very effectively in practice.
The skirt
If modelling Wheki ponga then the skirt can be formed from etched fronds suitably deformed. If doing so, the skirt should be added as part of the crown. It pays to leave such dead fronds sticking out radially from the trunk until the trunk is finished when they can be folded downwards. For reasons of economy it is probably worth adding an underskirt from hemp (as below), just reserving the metal dead fronds for the outer, most visible layer. It is not a bad idea to model one or two dead or dying fronds even if the fern that you are modelling does not typically have a full skirt. In nature it takes a while for fronds to senesce and finally drop, so a natural fern will usually have a few fronds somewhere in this process.
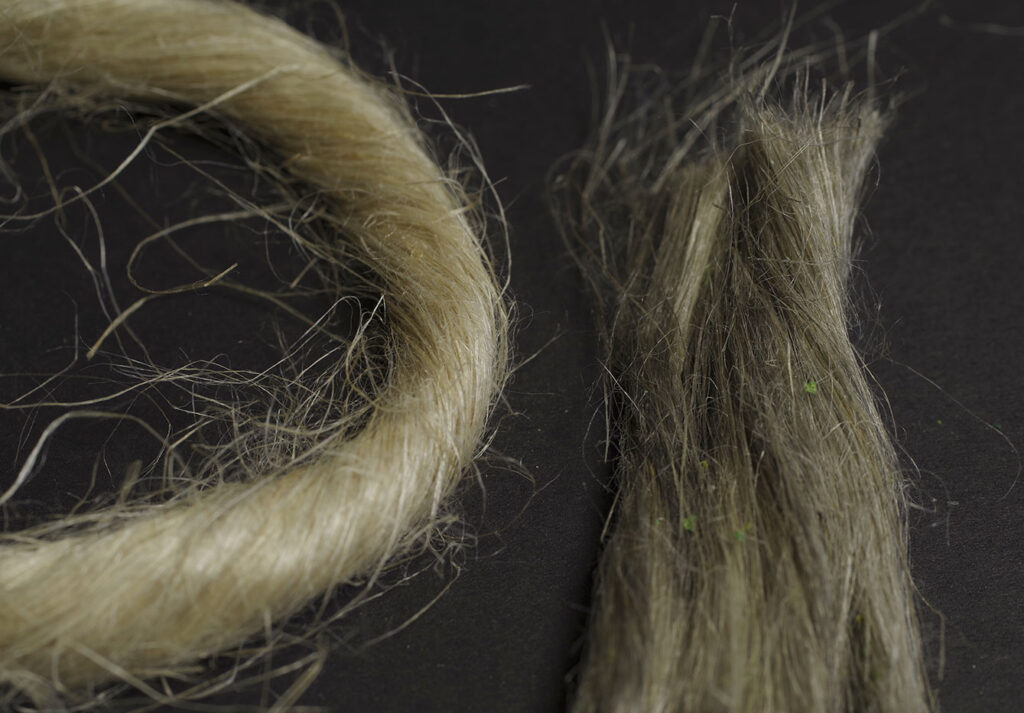
Plumber’s hemp. As it comes from Mitre10 (left) and after colouring with dilute black India ink in alcohol.
For the other ferns I find that plumber’s hemp works well. For Katote something a little stiffer such as bristle may be better. I colour the hemp in bulk with ink in alcohol allowed to fully dry before use. The hemp can be attached below the crown with PVA. It is easiest to fit it over length and to trim with fine scissors once firmly attached.
Ferns grown as ornamentals often have any skirt and dead fronds removed, so can be modelled in a tidy state.
Detailing and finishing
My detailing and finishing depends on how visible the plant will be when placed. It will usually involve:
- Touch up of any bright metal with frond top colour. Typically there will be some little bright spots where the frond was attached to the fret. These have a habit of showing up when least convenient so it is worth touching them up.
- Washes and/or dry brush can be used to highlight trunk detail. This will be best done before the skirt, if present, particularly if it is substantial.
- Add moss and climbing plants to the trunk by stippling on PVA and then fine ground foam flock. This can be extensive in damp bush areas, to non-existent in dryer more exposed areas.
- Consider adding some dead fronds (grey/black) on the ground around the base of the fern. These are typical of ferns in natural areas.
This rather cruel shot shows the key elements. The frond scales on the trunk are obvious, as is the way the static flock hides the otherwise awkward interface between trunk, fronds and hemp skirt.
The kits
NZFinescale does two kits for tree ferns. One for the Mamaku/Silver fern and one for the smaller varieties. Kits consist of fronds etched in 0.15mm phosphor bronze together with 3D printed trunks. Each kit will do 2-3 tree ferns (or more) depending on how many fronds are used. Young shaded plants typically have few fronds, while large emergent plants will generally have many more. This post applies to the current versions. Note that there are legacy versions of these kits/etches that differ somewhat.
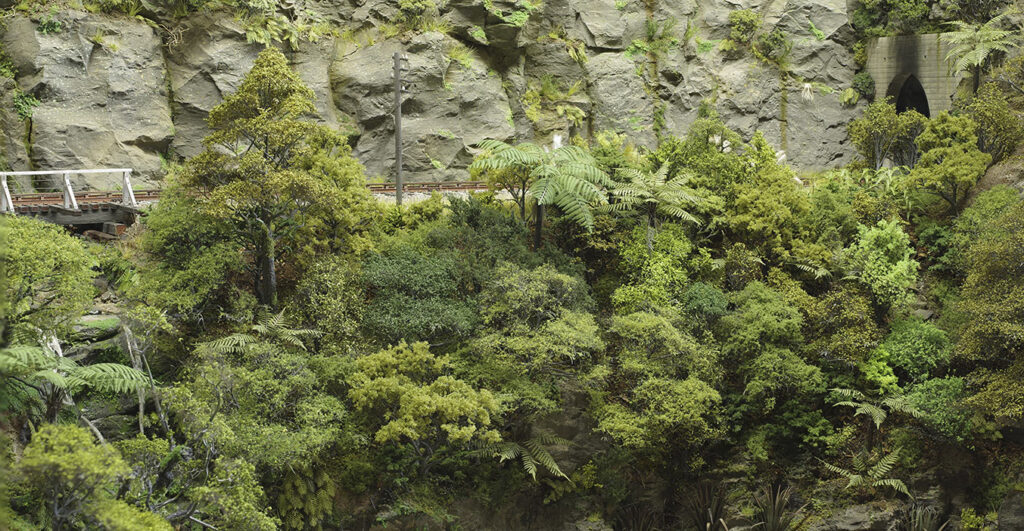
In context. When combined with appropriate trees, tree ferns can really help create a New Zealand atmosphere.