
If I were to look out, and blow the dust off, my degree certificates I’d remind myself that once upon a time plant science was my life. Thus when it comes to modelling trees and foliage I have always viewed them as models in their own right rather than just a soft green backdrop. ‘Tree’ is like ‘locomotive’, describing a broad category of objects not much useful in defining a modelling subject. The first secret to really good tree models is to decide what species of tree you are trying to model…
Gordon Gravett’s ‘Modelling Trees’, is an excellent recent exploration of modelling the trees of Europe. The techniques are broadly useful, but our New Zealand trees are a little different.

Gravett’s general approach is typical though. Firstly an armature of some sort – the trunk and branches of the tree. Next something to support the foliage – the twigs, but not necessarily twig-like. Lastly the foliage. To a greater or lesser extent this approach is common to most tree making. In this post I’m focusing on the armatures.
But before looking at the ‘how?’ of tree making, it is worth considering the ‘what?’ and ‘why?’. Is it going to be a forest or a specimen example. If it is, or they are, deciduous what season is being modeled. Scale is relevant, as is budget for time and money. Is the aim for a nondescript backdrop, or do the trees need to contribute to the realism of the scene. Factors like these will drive the choice of method, and what is best for one situation may not suit another. In any case, my experience of models generally is that they are far more convincing if it is not obvious how they were made. A sprig of yarrow bears a passing resemblance to a scale tree, but is not very convincing. It IS possible to use yarrow as the basis for a pleasing tree model, but it takes a bit of work. If it still looks like yarrow when finished, then the result is not convincing (to other modellers anyway). Your peers have seen plenty of yarrow trees, so they are difficult to deceive.
One way to acheive some deception is to mix up the methods. Provided some effort is made to achieve a consistent look, a scene with trees made with a variety of methods is going to be better than one where all are made the same way (unless you are aiming for something like an avenue or pine forest).
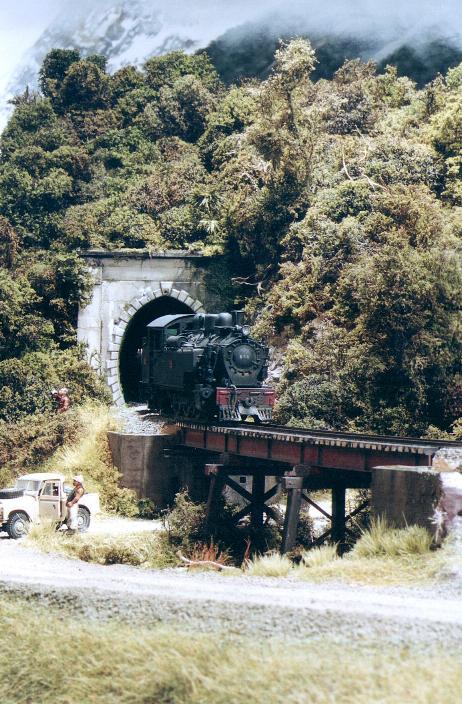
The tunnel on the old Brunner layout nearly 20 years ago. A variety of tree techniques here by Barry FitzGerald
Armature techniques
Natural materials
It is not surprising that in tree-making modellers have long looked to real plants to provide the basis for models. Quite a few plants have inflorescences (aggregate flower structures) that resemble trees. Into this category of materials fall Yarrow, Buddleia, Sedum, and sea foam/sea moss. All these plant parts have a fairly fine branch structure, which is the sort of thing we might want. The arrangement and structure of them differs, which is a good thing. There are a few difficulties with inflorescences though. Firstly they are inherently regular, which is generally not tree-like (Although some conifers certainly are). Secondly they can be a bit fragile. Nevertheless sea foam is sold in many model shops as the basis for trees and yarrow is very popular. In both cases the results are very much improved if the natural appearance is disguised. For example by bunching stems and providing vertical layers in the case of yarrow, or in using sea foam twigs attached to other armatures. Bunched stems can be disguised by binding them together and coating in ‘bark’. This usually involves using tape, wire or string to fix the individual sprigs together and then coating in very high build material to hide the makings and provide a bark texture. Typically bark will consist of some form of water based filler let down with PVA glue. There are various texture paints in art and model shops that can provide a good bark texture as a last coat before painting.
Sage brush branches can make excellent, somewhat tortured-looking trees, but as far as I know this material is not available in NZ. The closest thing I’m aware of is sheep nibbled heather – a material that Trevor James has made good use of. It is possible to find natural twigs and branches that can form the basis for a good model tree. In my experience these are few and far between though. Well worth taking the opportunity if it arises, but not the best basis for a forest. If these have yarrow or sea moss branches added this will make the approach a lot more flexible.
Barry FitzGerald put me onto roots as a source of armatures. He gathers them after river floods, but I’ve also collected them at the beach and in the UK in a field where a plough had ripped up the roots extending from a hedgerow. Roots frequently have the proportions appropriate to scale trees, are generally quite robust and seldom regular. They can be very tree-like if carefully selected.
Fine roots make excellent deadfall branches too.
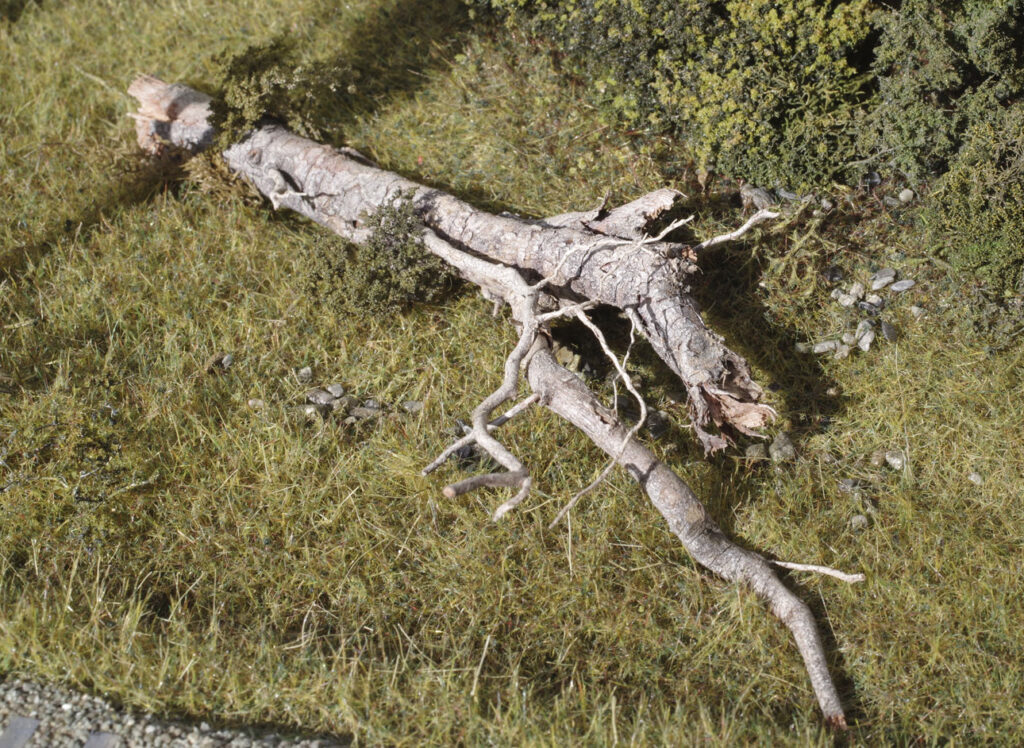
A root artfully posed by Barry FitzGerald as a fallen tree on my photo plank
Lastly in this category are lichens. The popular reindeer moss is one such, but some NZ lichens also have uses. The key with these materials is to disquise them as they have such a long history in model making that everyone knows what they are and, despite their fine branches, they always look like lichen.
Fabricated armatures
Twisted wire armatures in the tradition of George Iliffe Stokes and expounded by Gordon Gravett can be very realistic depending on the skill of the modeller. As they are entirely fabricated the approach can be used to model all manner of size and form of tree and is thus extremely versatile. On the down side it is quite time-consuming and does require practice. This approach would be considered by most to be the pinnacle of tree modelling if well done, and until quite recently I would have been one of them.
A much faster approach is to use pre-fabricated armatures. These are available as plastic mouldings, white-metal castings, etchings and similar. Generally relatively expensive and lacking in variety they can be successful provided the source material is disguised, but they really offer little advantage over other methods.
A very cheap ready made tree from China based on an etched armature. Not too bad provided the viewing angle hides the rather flat branches. Such trees are generally based on northern hemisphere species, so not always applicable for NZR layouts
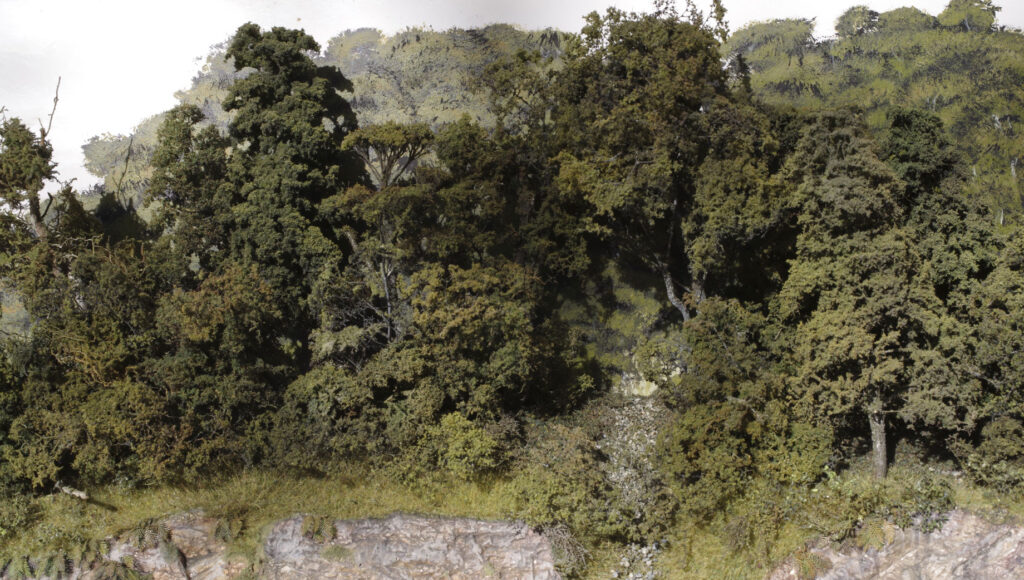
The ‘forest’ on the photo plank. I made the trees, and Barry FitzGerald reworked the scene. There’s all sorts in here. Tree roots, tree roots with yarrow branches, tree roots with sea moss branches and probably some wire-wound armatures too. This scene was made up over 10 years ago, so I’m vague on exactly how each tree was done. For the most part it is very hard to work out the method from the result, which greatly contributes to the realism.
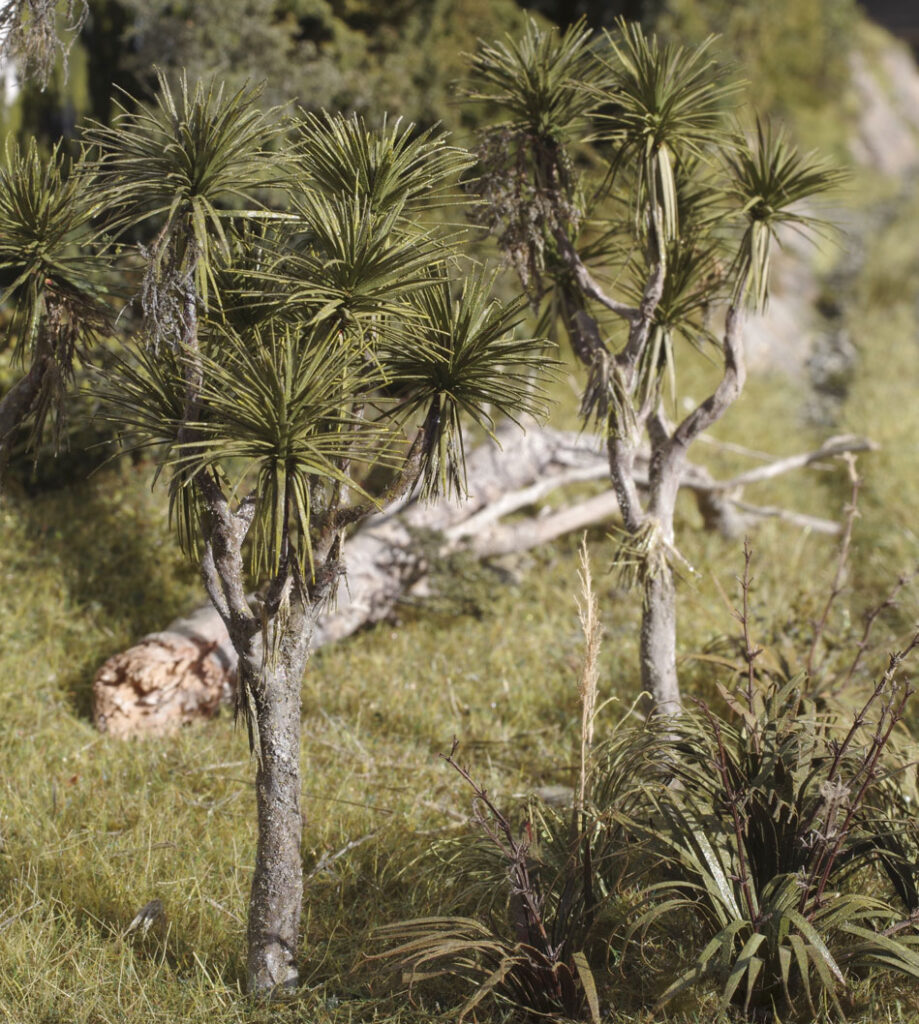
A cabage tree grove. I cannot actually remember how these were done either (surely an endorsement!), but I suspect wire armature. The leafy crowns are from my brass etches, but the dead leaves and inflorescences are from natural materials.
The digital approach
The final approach is the one that I feel will shortly become popular. That is 3D printed resin armatures. The advantages of these are:
- Very quick to generate once one has ascended the learning curve. Various software has tree generating algorithms that are tunable with random elements. This enables unique trees modelled after a specific species to be generated more or less endlessly in a short time.
- The number of small branches that can be practically printed is huge – far larger than you could contemplate in anything other than a one off wire armature.
- With the right printer you can print big trees. It is not hard to get 300mm if done in two parts (which is desirable for other reasons anyway). Or you can print a lot more smaller trees.
- Compared to natural materials of similar dimensions the trees are tough.
Obviously you need the skills and gear to do this, but the gear is getting quite cheap and the skills are not hard to learn. In principle it would be possible to digitally 3D model an extremely detailed tree. In practice I find it is better to tweak the digital tree generator to generate the sort of tree that I want. I then browse though the results to find trees that I feel work. These are then given fairly cursory tweaking/pruning. This generates a superb armature relative to any of the methods above, but there is still a need to texture and finish the print into a convincing tree. There is a balance between what is done on screen versus what is physically modelled and some may prefer more or less work in either mode. Generally the machine generated tree will be quite sterile in appearance, so applying textures and colour to the basic armature is an easy way to make them appear more natural.
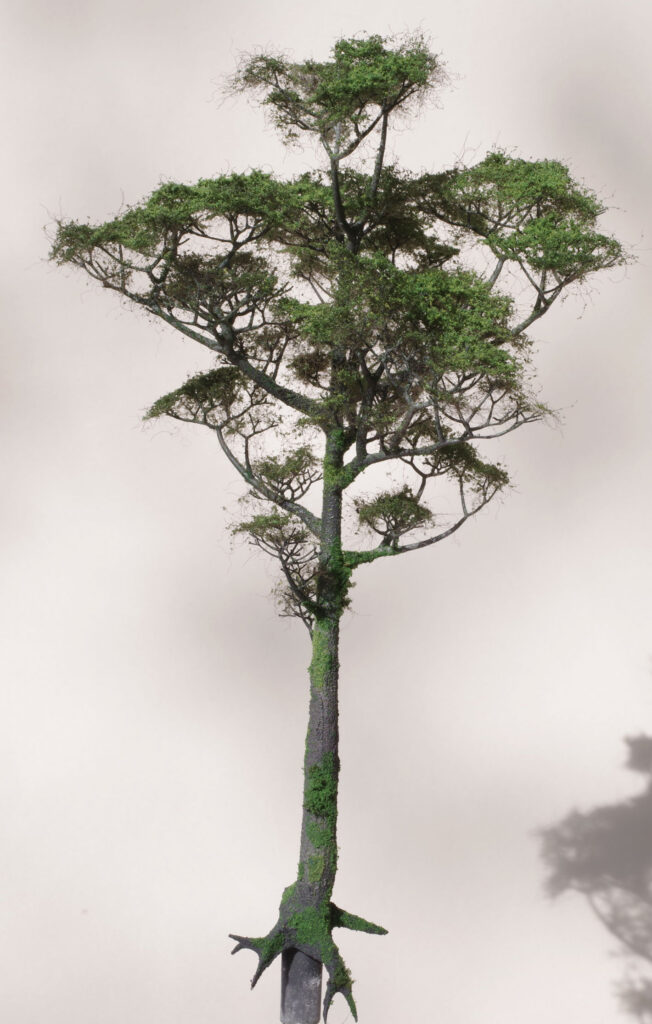
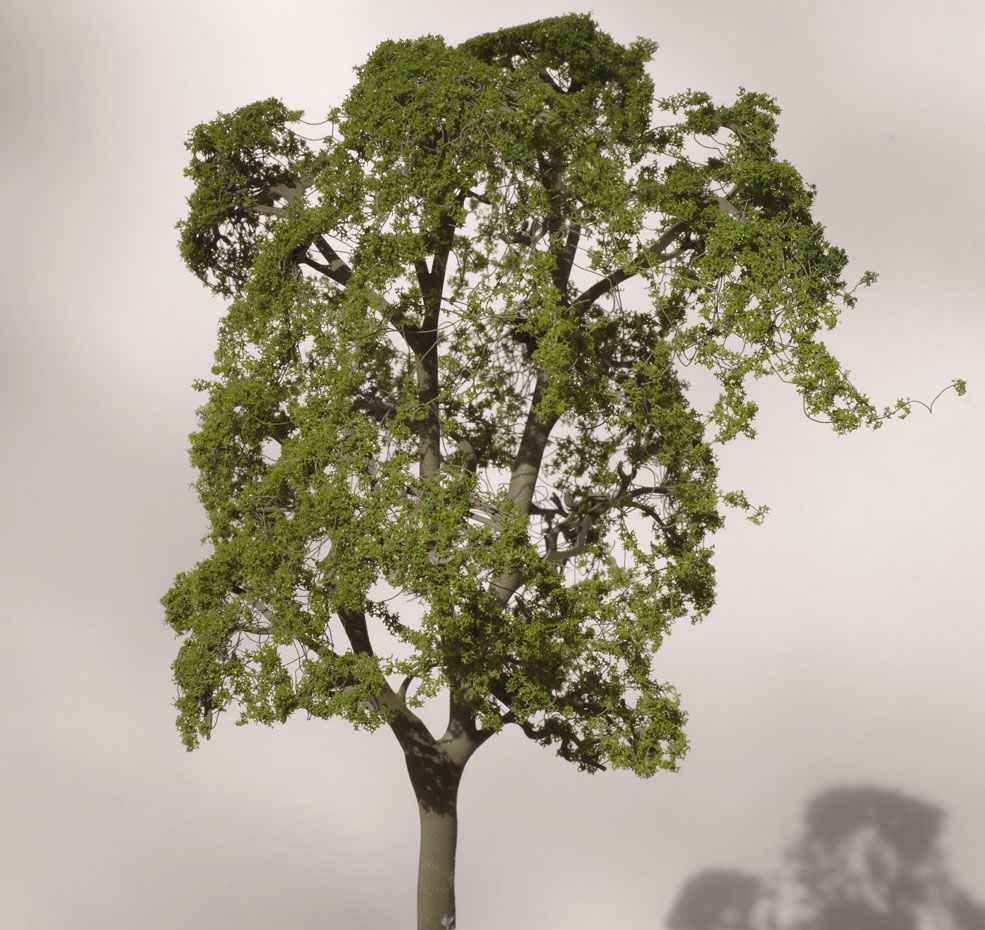
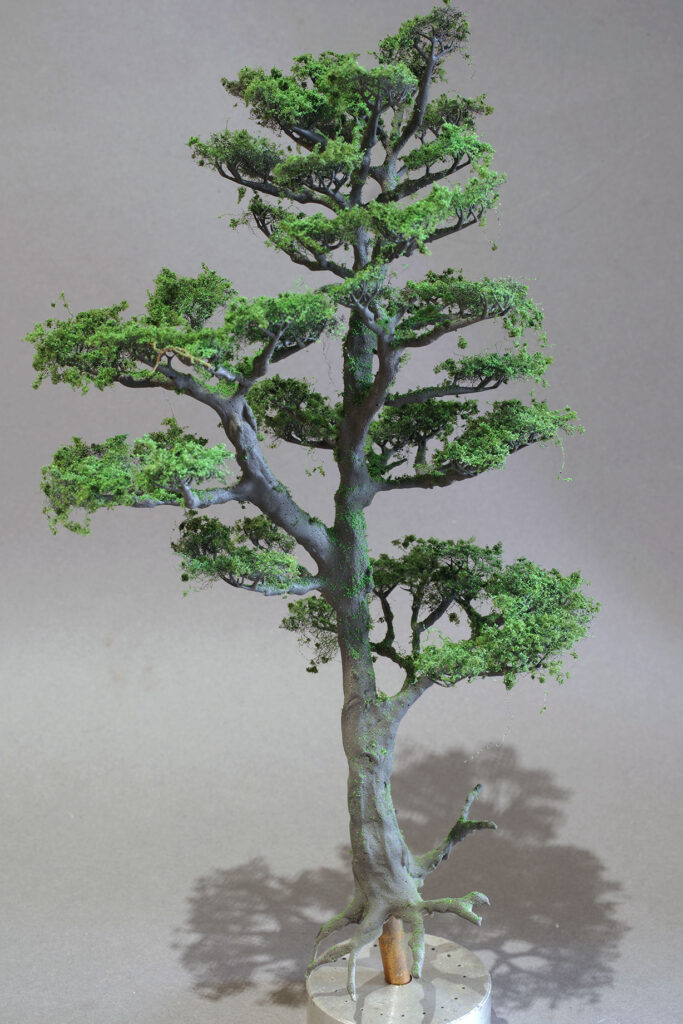
One of my first 3D printed full size trees (around 200mm) modelled on Silver Beech. Printed in two parts, the join being just below the first branch.
Mix and match is possible too. 3D printed branchlets onto the tips of wire armatures or 3D printed branches added to a root trunk are approaches that would work well and speed matters up a bit too.
A quick proof of concept tree. Wire armature with 3D printed branchlets . The branchlets are quick to print and you can do a lot in one go.
The 3D printed armature is still a relatively new approach and I imagine development will be rapid. I’m starting scenic work on the layout and doubtless progress will appear here in due course.
As can be seen from the photos here, tree models look far better in context than on a sterile background. Personally, I feel all the trees featured in this post look better (sometimes considerably so) in the flesh. I’ve found it quite tricky to do them justice in the photos. This tree write up was prompted by some Facebook discussion. Tree making is not my current focus but if you’d like anything here expanded on let me know in a comment.
1 comment