
The Addington car
Many of my blog posts offer some philosophical insight (I hope) or practical dodge that I feel a burning need to share with the modelling fraternity. In contrast, this post is a shameless promotion for an upcoming kit that I’m super excited about, having just completed the assembly phase of the pilot model. I thought I’d document it at this point as the construction will not be so obvious when it is painted and finished.
The BP91 ‘Addington’ cars were described at length in John Agnew’s article in NZ Railfan (December 2010). They were attractive 43′ long clerestory roofed cars dating from the early 1880s, in some cases lasting into the 1960s (though often in non-revenue service). Pretty much any steam era layout can justify one.
From a modelling perspective they are attractive subjects as they have interesting external detailing and eventually ended up with quite a variety of sheathing treatments. There were also a variety of seating variants and lavatory arrangements. This enables a number of the cars to be run in a train without them all being identical. The variants serving Rewanui in 1940 have been described in a previous post. An earlier post contains additional information on Rewanui cars.
The test build represents A40, shown in the picture below from the John Agnew collection. The kit will be available in a number configurations and, in principle, could be customised to represent any Addington car without too much trouble. The model is only test assembled here so there are one or two things still to add, clean up or tightly fix.
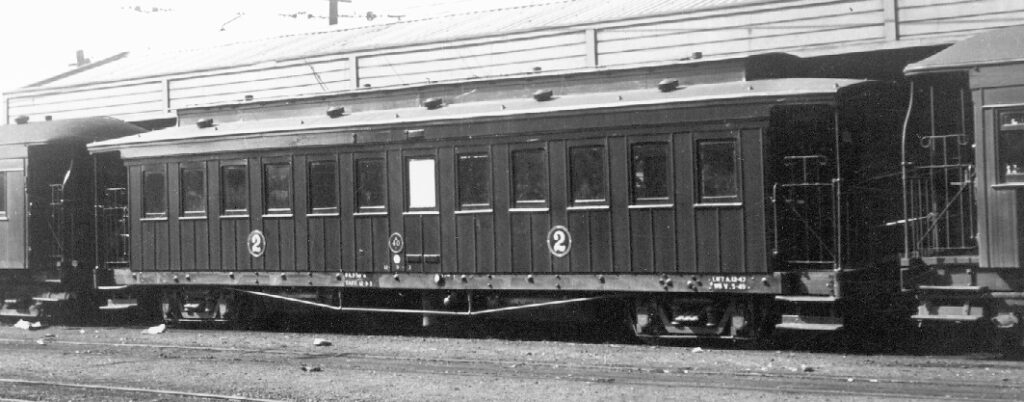
A40 at Christchurch 1950.
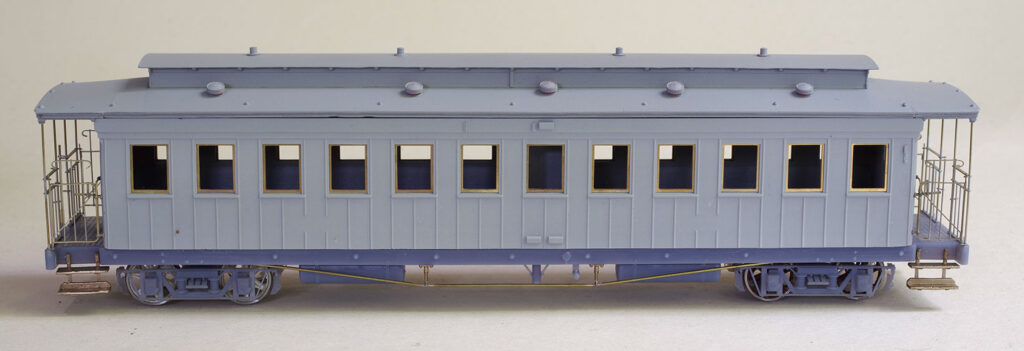
A40 at Christchurch 2020.
Easy to build?
One of the benefits of 3D printing is the ability to produce parts that would be impossible to mould. This kit has been designed with a lot of very fine detail, BUT for the most part this is incorporated into the major parts, so there is nothing for the builder to do other than admire it. The body is a single part. The roof comes in 4 pieces: The main roof, a plug in elevated section that is a press fit and the verandahs which are positioned using dowels.
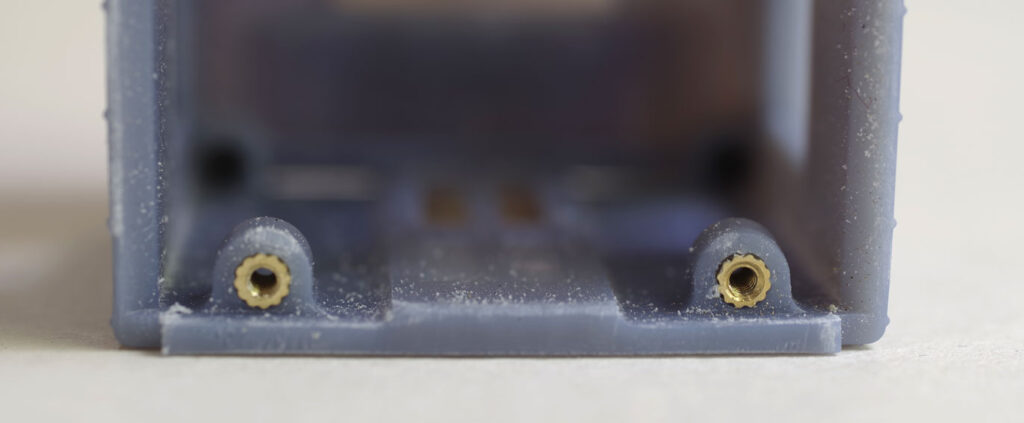
Threaded inserts are used to provide durable and positive fixing of the main parts
The kit comes with jigs to complete the railings and gates (described in detail here). Other parts are designed to clip and fit together in a positive way with very minimal clean up required.
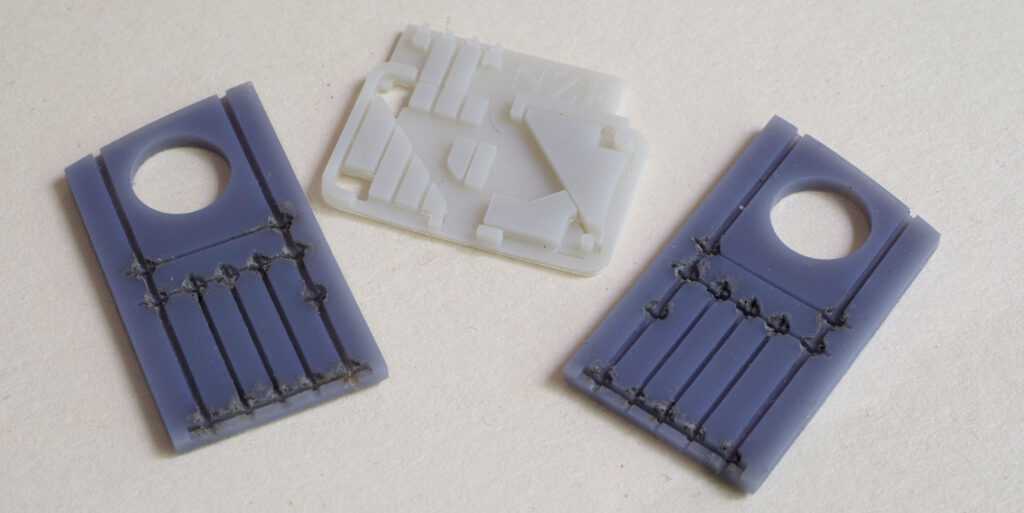
Jigs for railings (used) and gates.
The bogies are a new design intended to make building foolproof as well as reducing cost. Better, easier AND cheaper!
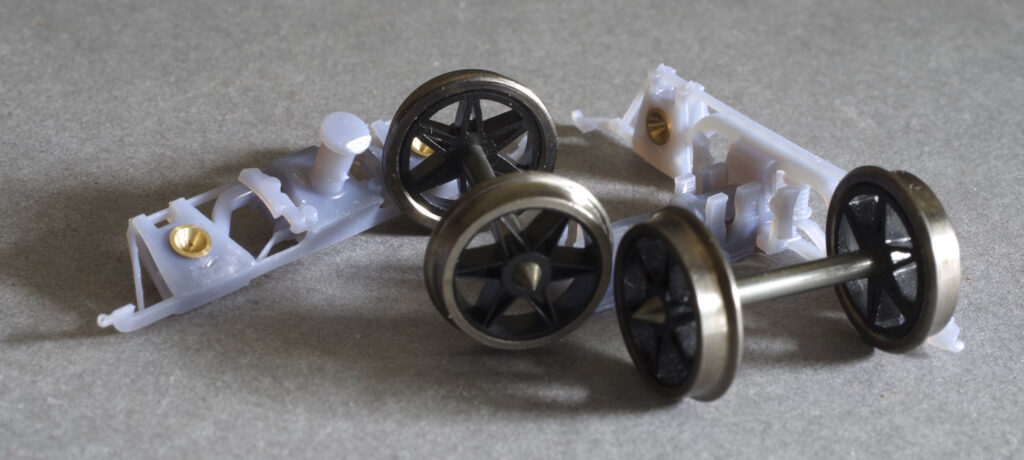
An NZFinescale bogie in bits. Essentially three printed parts that clip together to produce an accurate, compensated, free-running bogie. Ready to run in minutes.
Detail?
The goal with this kit was to produce something that was a very accurate representation of the prototype without making it difficult or excessively time-consuming to build.
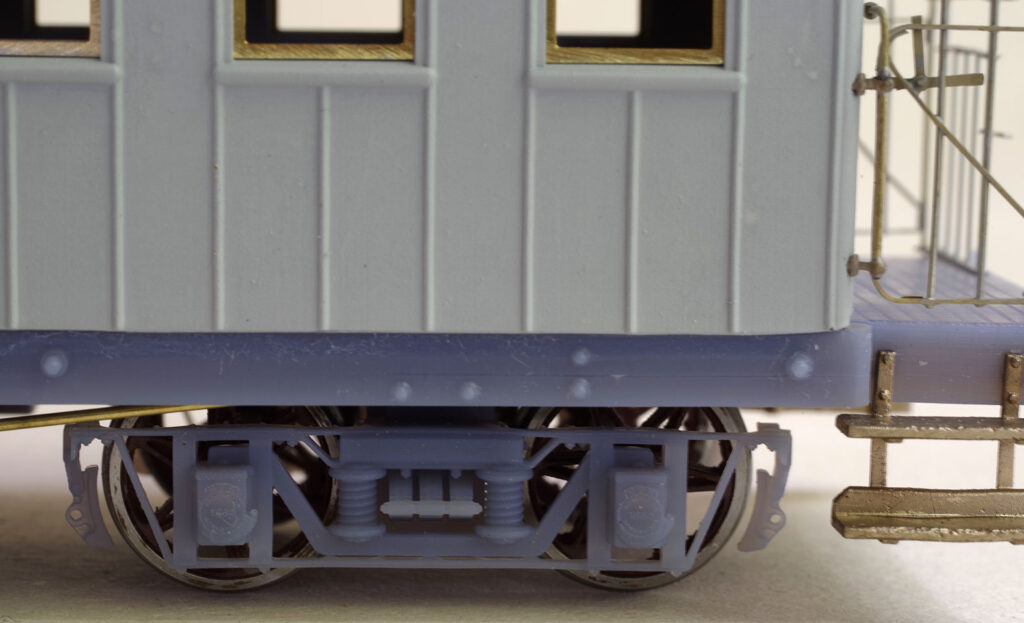
Plenty of detail here: Axlebox with legible text, delicate hollow leaf springs, hex nuts on the tie rods, and correct rectangular feet on the handrail knobs.

Peeking into the interior, the longitudinal second class seats are modelled.
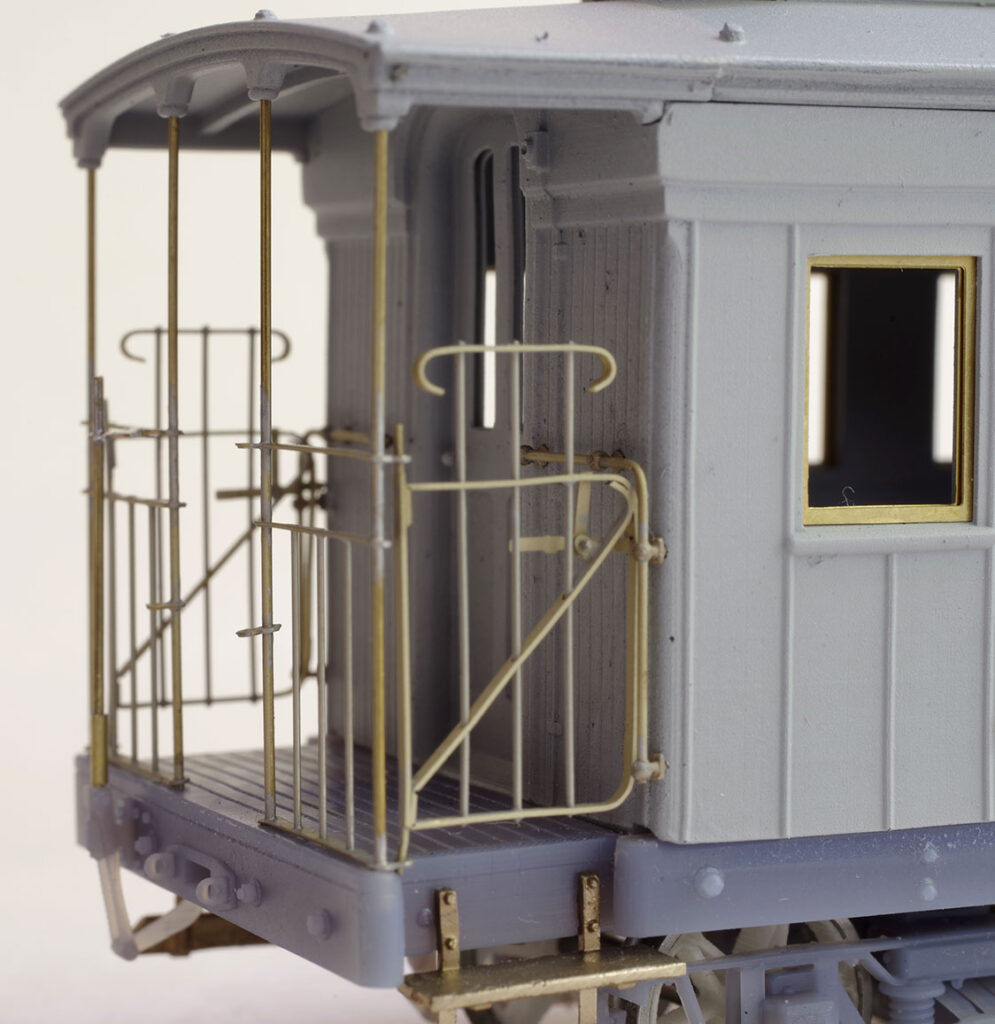
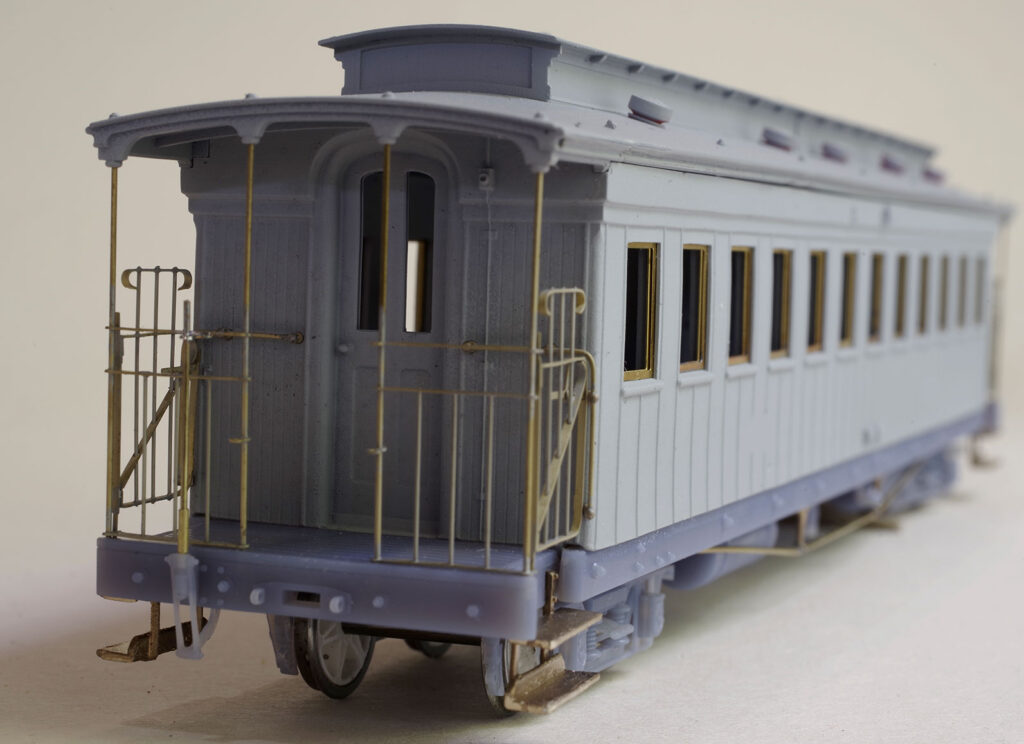
The verandah ends are full of character. Note the ferules at the top of the railings, detail on the underside of the roof as well as the non slip casting on the platform edge.
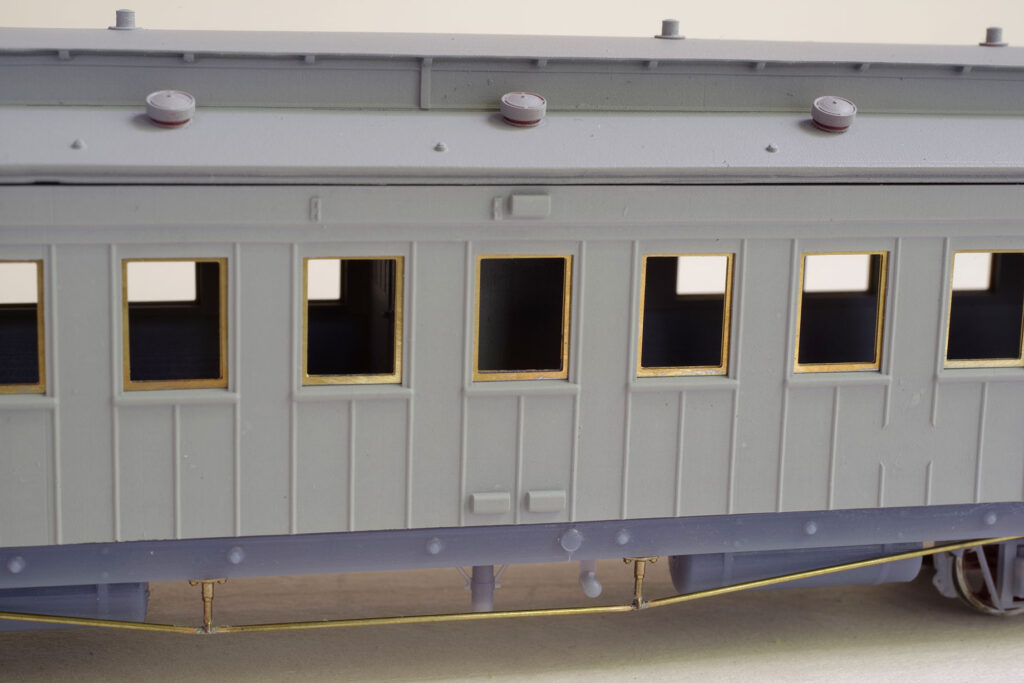
Details around the centre lavatory. Note that all of these window frames have a glazing slot to make fitting the glazing straightforward. All the windows slide open too.
Runability?
On fitting the bogies I narrowly avoided a nasty accident when the car ran away on the dining table, which clearly wasn’t as level as I’d thought. This car runs so well that I will probably need to add a wiper to an axle to prevent it being too lively. The compensated bogies mean that all the wheels will be on the track all of the time so it should perform really well even on indifferent track.
Final shot