
There’s been a bit of a burst of activity at Chez Finescale of late. While it’s all been pretty good stuff it probably looks a little random and scattergun from the outside. To be honest it feels like that on the inside too sometimes, but really the soft focus approach has been driven by two factors. Firstly, the latest print technology and the new opportunities that allows and, secondly, the need to obtain castings and etchings which tends to form a speed bump in any project.
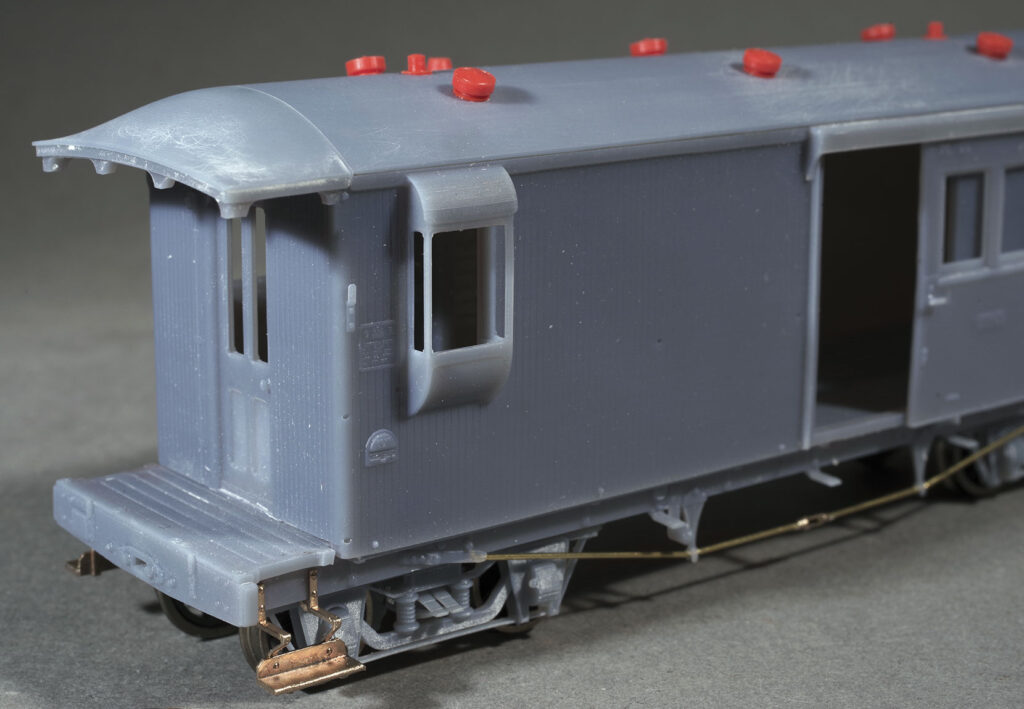
One of my current foci is the Addington cars, but these are relatively large and definitely victim to the casting/etching speed bump. So while awaiting some of the brass goodies I made a start on the BP3866 30′ van. This is obviously a slightly smaller vehicle, but similar enough to the cars to allow it to be used for testing ideas. The van too has now paused in a passing loop awaiting detail parts, but is sufficiently advanced to share progress. This is very much a proving model. Some parts I have not cleaned up and I broke the roof corners when I dropped it. Some fit is a bit average and has been improved. Some things were a bit tricky, so the design has been reworked to simplify. But the van to this stage is just a couple of hours of easy work and a few drops of CA glue.
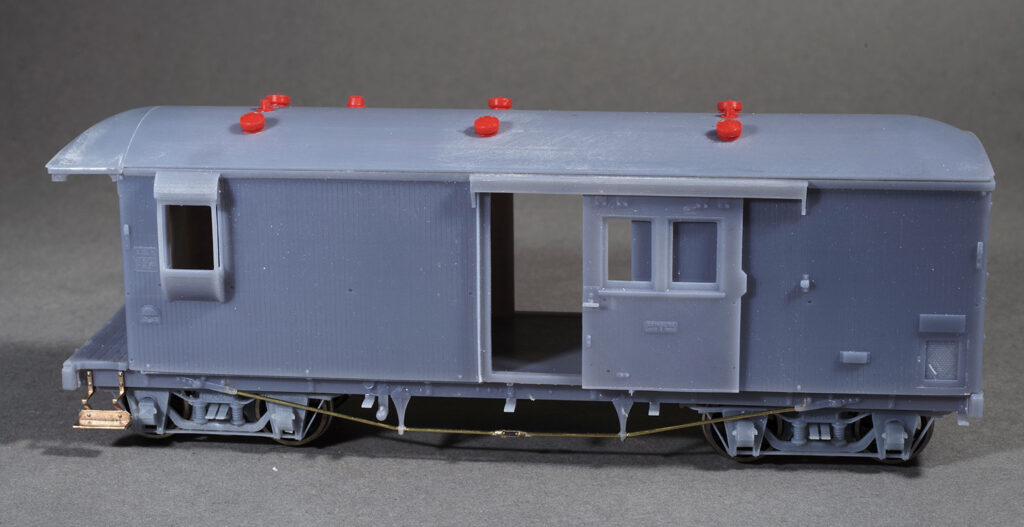
The BP3866 van
There are a few philosophical decisions to grapple with in designing any kit and 3D printed versions are no different. Some of these here were:
- How to split the parts up? 3D printing is not magic and it has strengths and weaknesses. Each printed part needs to be optimised to get both a good print result and achieve the detail, fit and function required. I also try to minimise, or at least simplify part clean up.
- Which parts to print and which to etch, cast or fabricate? Factors like strength, simplicity, fidelity and cost come into this calculation. The van is almost entirely printed, but there will be etchings for window bars, luggage racks, plates and so on. As can be seen, the truss rods and steps are brass as they are too fragile to print (They do print, but it is unlikely they would last on a layout).
- Build practicality. Questions such as how to arrange glazing so it is achievable.
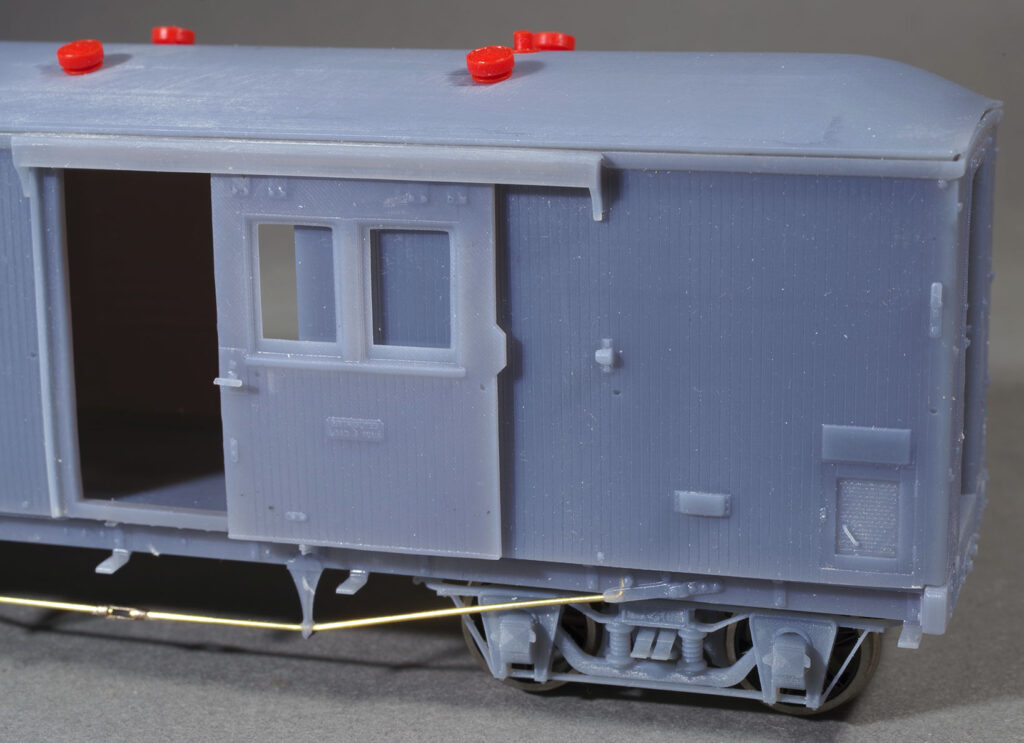
Detail level on these prints is extremely good. Lettering on plates is as legible as it would be on etchings and details such as lamp irons, door knobs and so on are well formed. This creates extra pressure on me as there was plenty of detail to add such as the various body bolts, gas gauges, gas pipe and key on the platform and so on.
The kit features:
- Accurate patterns based on the works GA/detail drawings and a preserved example as well as the excellent Kevin Crosado articles in NZMRJ.
- 1 piece body. The hard bit is done.
- Screw construction. Threaded brass inserts allow the underframe, body and roof to be screwed together to assist in detailing and painting.
- The 1 minute bogie. 3 resin parts that clip together for an accurate, smooth running result.
- Opening side doors. These run smoothly on a brass wire runner.
- Internal detail in the guards and luggage compartments.
- Detailed underframe – easily put together.
- A proper ‘turtleback’ roof profile.
- Separate roof fittings so that the roof can easily be smoothed before adding the roof furniture.
- Easily glazed lookouts. Glazing slots in end doors.
- Early or late versions. Illustrated is the early version with short compartment, long footsteps (not yet fitted here), long handrails and no rear steps.
- Excellent fit of parts. The steps in the photos are a gentle push fit into the underframe.
- Comprehensive casting set with accurate handrail knobs and other fittings.
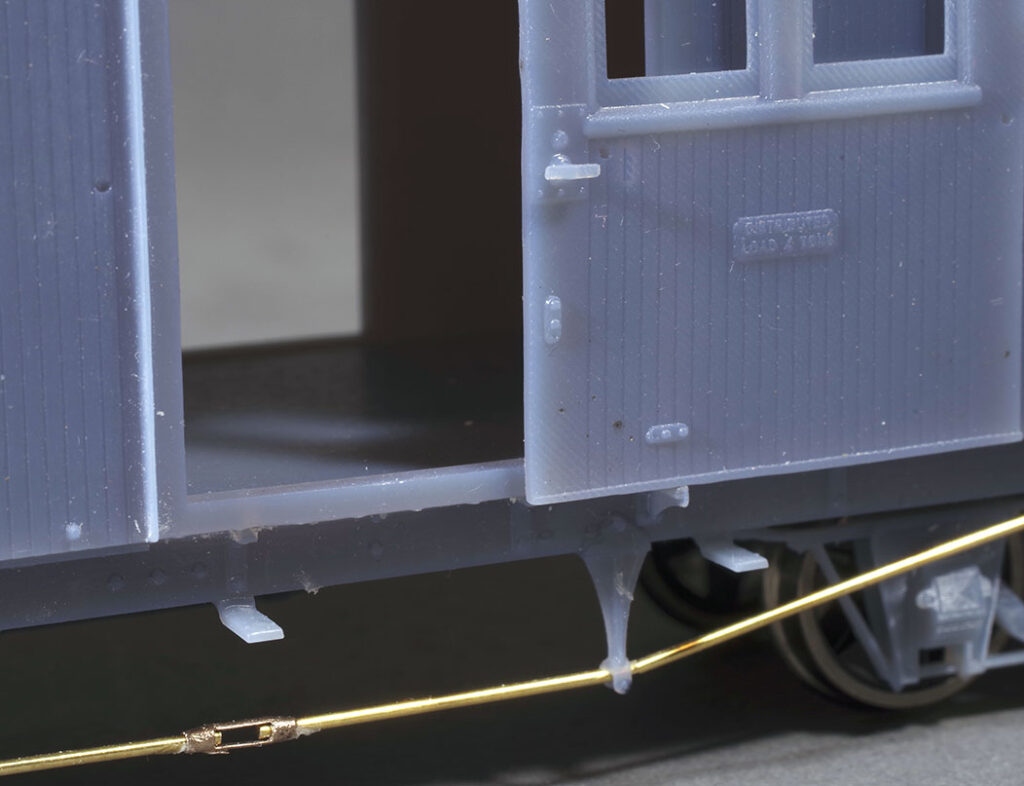
Most of the super-detailing is incorporated. The door handgrab ends are accurately portrayed and just need a loop of 0.3mm wire to be brought to life.
More details. The hinges, latch, handle and perforations of the dogbox door are all well resolved (though this pic doesn’t entirely do the perforations justice).
Etchings are on the way for this (and other) projects so look for a kit release around the end of October. In the meanwhile I’ll probably advance this build a little further and maybe give it a squirt of paint before it features again.