
If you aspire to a model railway, the thing you need most of is wagons. This post is a little retrospective of my wagon-building journey and a preview of new kits on the way.
I have a long-standing enthusiasm for West Coast coal railways and my first scratchbuilt wagon was a Q5. Scratchbuilt in styrene, I was really happy with the model, but not so happy with prospect of building a fleet. So I did patterns in brass for pewter castings and a few cast brass detail parts, and did a limited run kit for a group of subscribing friends in the days before NZFinescale. These were quite nice, admirably thin and went together pretty well, but had some of the drawbacks inherent in pewter kits.

One of the original (early 90s) pewter Q5s. A first try at heavy weathering. Painting as per diagram, but not accurate to practice. Visually nice, a bit weighty and quite a drag on the drawbar.
After this I started to play with etching and had read about the advantages of suspension. This lead to the Iron L kit as well as underframes for the available injection moulded wooden L bodies.

Injection moulded body on an etched underframe. A step in the right direction speed-wise although the body has some limitations and requires some work. The wooden L is the only wagon for which a plastic body is available though.
This was followed with the Q2 and Q3 kits in etched brass. The result was a small collection of kits that built into superb models, but not without some effort. All brass Q1 and Q4 kits were also developed, but deemed to be just too difficult to be worth releasing (although I did enjoy the test shots).
The etched Q3 with two-lamination fold up hopper. Neat, and I’m proud of the design and result, but hardly quick or easy.
I was not entirely happy as:
- While the result could be superb, the time and skill required were on the high side. This isn’t neccessarily a huge issue for a few wagons but, if you want a reasonable number, enthusiasm can be hard to sustain.
- The wagons were great – but I hadn’t entirely sorted out the common bits such as brake fittings, sidechains and couplers: details that can take a lot of time.
- I had the belated realisation that Q2/3 were Westport only wagons and my interest was around Greymouth.
I’m not at all averse to challenge, but I’m not that enamoured of facing the same challenges repeatedly. So what I really wanted was a series of kits that:
- Were fun to build without needing too much time or skill (this being relative of course).
- Looked really accurate.
- Performed well in a train
- Had a suite of detail parts that both looked the part and were relatively easy to robustly fit.
I’ve been working on the answer to this for some time and it looks like:
- 3D printed bodies. It is possible to print bodies to the required standard and appearance. I’ve had samples long enough to know they are sufficiently durable. Any initial distortion can be fixed with a little heat and once fixed the bodies stay true.
- Flexible details – it is relatively easy to produce variants with alternate doors, handrails etc. This allows the fleet to be subtly varied and correct for the desired period.
- Etched underframes. Strong and accurate.
- Sprung suspension. Basically the same as I’ve always done but, with better castings and experience, now much easier to assemble and tune.
- Accurate scale detail castings that are easy to use.
So all of that preamble is by way of introduction to the following four wheel wagon kits under development:
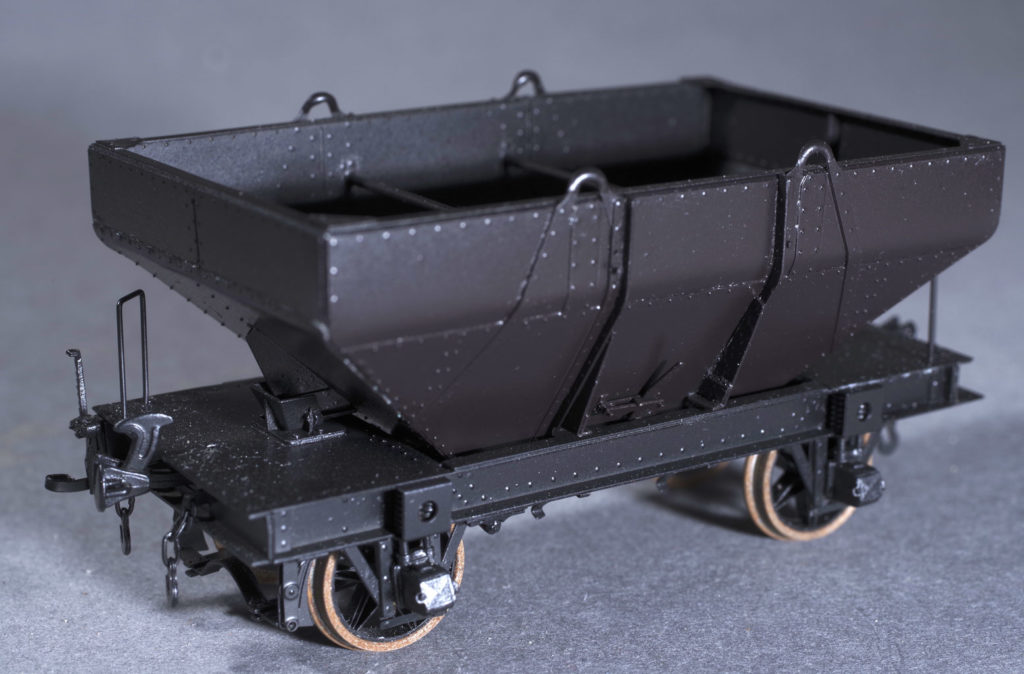
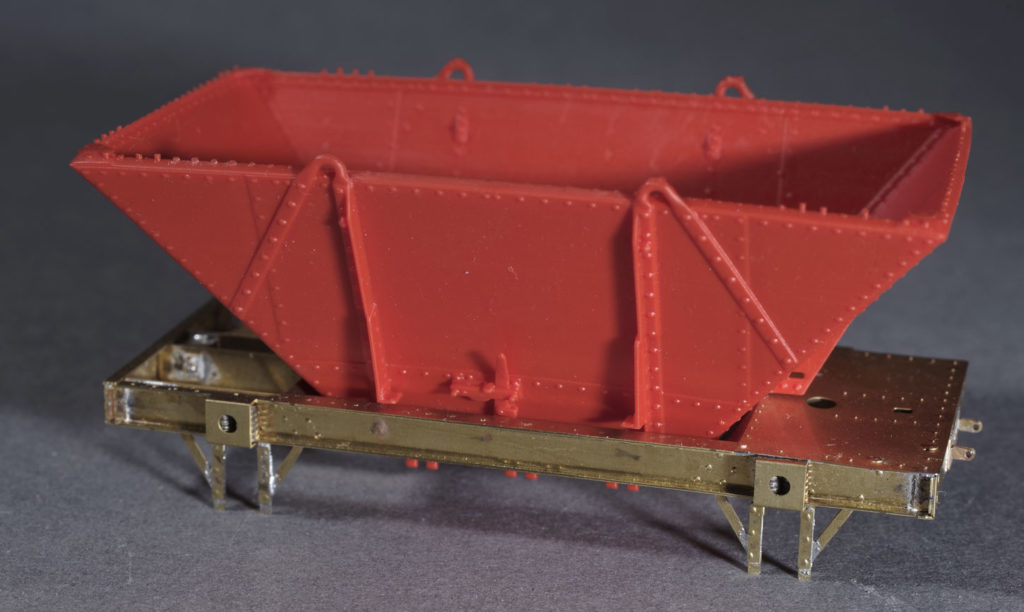
Q1
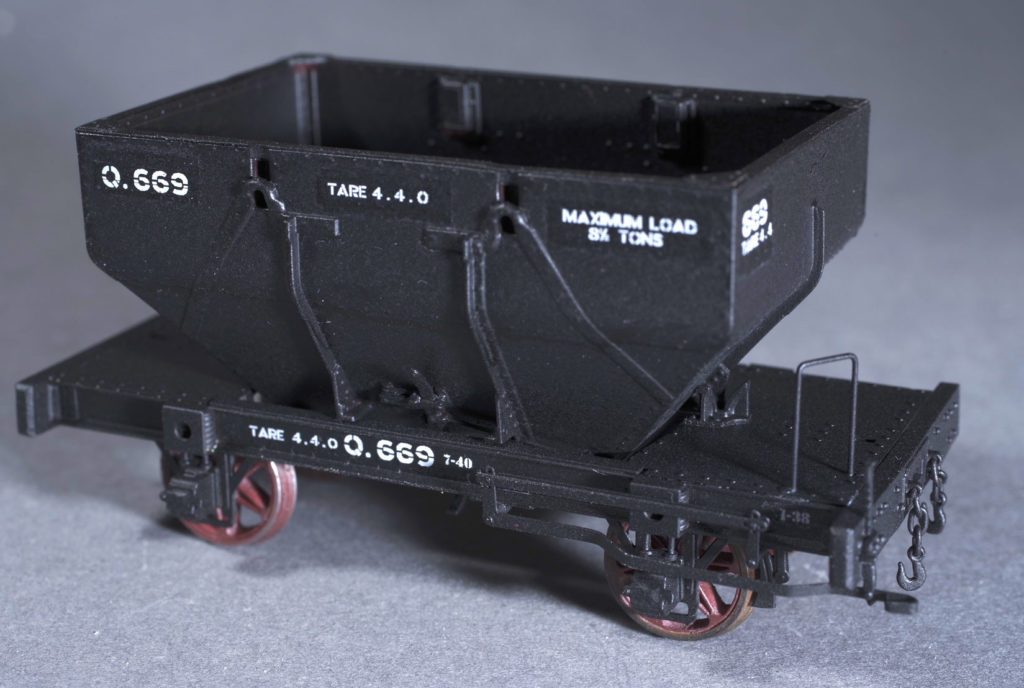
Q1 test build with weathering still to go.
I love the Q1. Rebuilt from the older fixed hopper ‘O’ wagon and extended to increase capacity from 6 to 8 tons the Q1 lasted a very long time and was found in both the Greymouth and Westport fleets. The hopper is one piece other than the doors, which are a press fit. The underframe is etched/cast brass. The parts fit very well and there is minimal cleanup to be done. Sidechain eyes are cast in place and everything locates in lugs. The brake gear requires care as it is quite fine, but generally it is all pretty straightforward.
La2
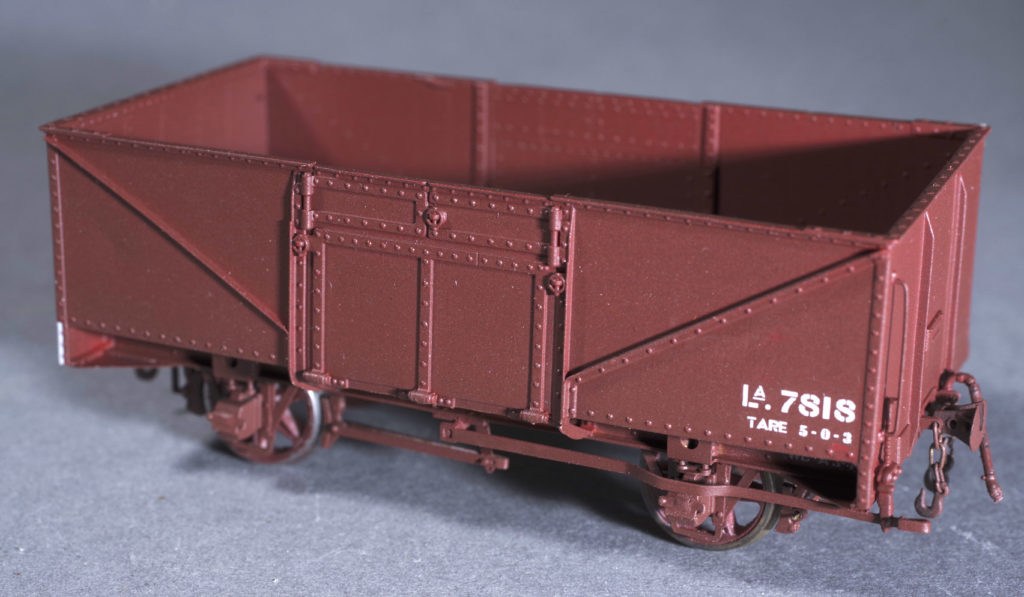
La2 test build. This early version lacks the chains on the door clips. I also have a version with ‘tired’ doors that sag a bit which is typical of the wagons in later life.
The challenge with the La is to achieve nice thin sides with sufficient dimensional stability. As with the Q1 it’s a one piece body fully detailed inside and out. The underframe is similar to all of my underframes just refined to be easier to build. Everything on the prototype is there – whether you chose to fit it is a matter of choice.
Wooden Ls
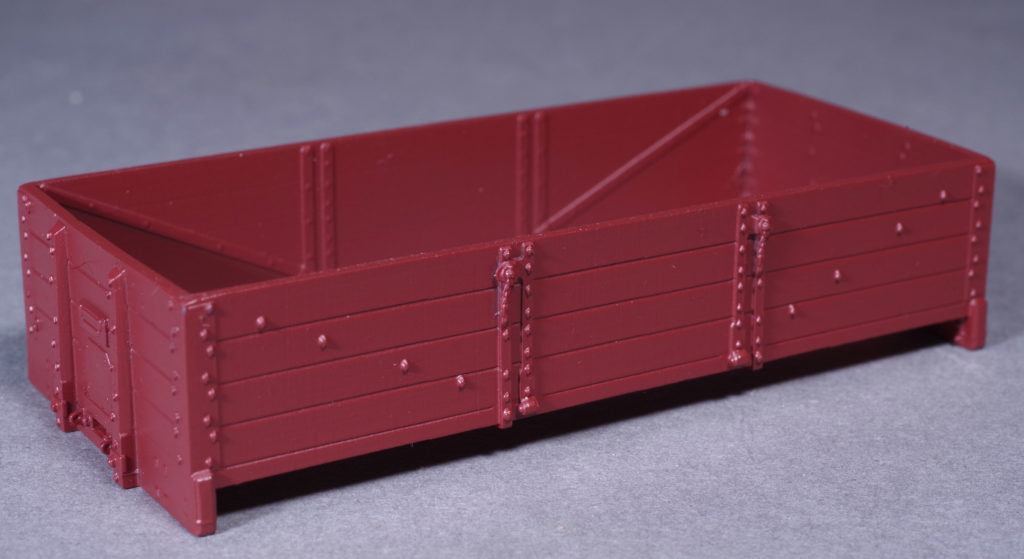
Constructionally, the wooden Ls are very similar to the La2. Compared to the injection moulded version above, the bolt and strapping detail are closer to scale and the chains on the door clips are resolved.
Q4
Q4 construction will be essentially the same as the Q1. The underframe parts are self jigging, and the hopper is, again, one piece.
Coming soon
As can be seen, all of these kits are close to ready to go. For the most part I just need to do some instructions and get in the stock.
Under consideration:
La6 (the one without headstocks) and a new Q5 perhaps.