
The layout is progressing apace driven by a, perhaps ill-advised, commitment to exhibit it in the near future.
As is the way of such things, the need to progress matters throws up those issues that have been lurking in the too hard basket. One such is the fiddle yard. Another is disguising the hole in the wall where trains disappear. The fiddle yard is not really too hard as the design was sorted a while ago, but it was certainly on the ‘to do’ list to finish. I may get around to blogging that later. This time around it’s the vexed problem of making ‘exit stage right’ less jarring with some sort of view blocker.
The layout design has both the incline and the bin backshunt exiting to the fiddle yard at the right hand end of the layout. This is useful as empties can exit the fiddle yard, be shunted in the station yard and then moved to the backshunt and off scene. Loaded wagons can do the reverse, avoiding any need to reset all of the stock or running unprototypical trains of empties or loaded stock in the wrong direction. Hiding the main line exit to the fiddle yard is simple enough as there were tunnels on the line that have been re-sited to suit. The exit to the bins is in the foreground though and for a long time I couldn’t think of anything suitable to place in front of the track to hide the hole in the backscene.
Then I remembered this:
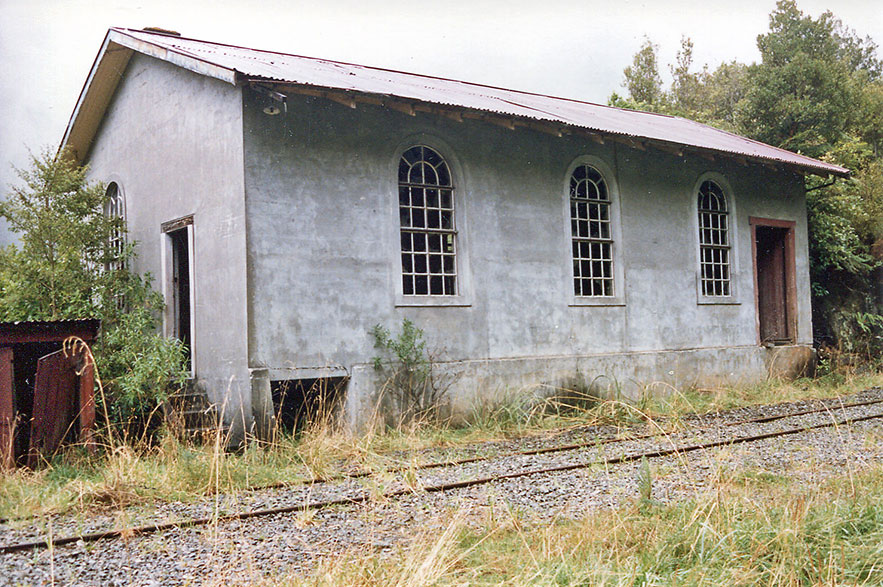
The mine store building (1987 image by Peter Ross). This sat past the bins on the backshunt at the end of the rope road from Middle Brake.
I first visited and photographed this attractive building in the late ’90s. It is unique at the station elevation in being concrete with iron framed windows. Most of the buildings at this level were timber framed and clad. Originally, I scratched my head as to it’s purpose, and couldn’t imagine any circumstances where I might model it. Wind the clock forward 30 years…
This is a relatively tall building close to the track, so as a view-blocker, it has great potential. However, the real thing is on the wrong side of the track and several hundred metres off scene relative to the layout. But any view blocker will be a compromise, so I though that bringing it up towards the backshunt bridge, shifting it to the other side of the track and modelling as the mirror image would give me a scenic break that was effective and at least in character, if not particularly accurate. I’ve also chosen to model the building in a kind of half relief to reduce the space required.
I did have a few photos from various visits, but only of the front/one end and the inside as I’d never though to model it. The required research was very quick and is an interesting experience in the digital age. The first step was to post what I had in an appropriate Facebook group. This quickly generated more images, interesting anecdotes from people who had worked there, and the information that it was the mine store. Knowing what it was enabled me to search Archives online and discover that the Christchurch office had a drawing. A visit turned up the drawing, which was useful, although undimensioned, and not exactly as built. In hindsight it should have been evident that the store (and bins etc) would be in the State mine files rather than the NZR files. That had not occurred to me previously and likely explains why I hadn’t come across the drawings earlier.
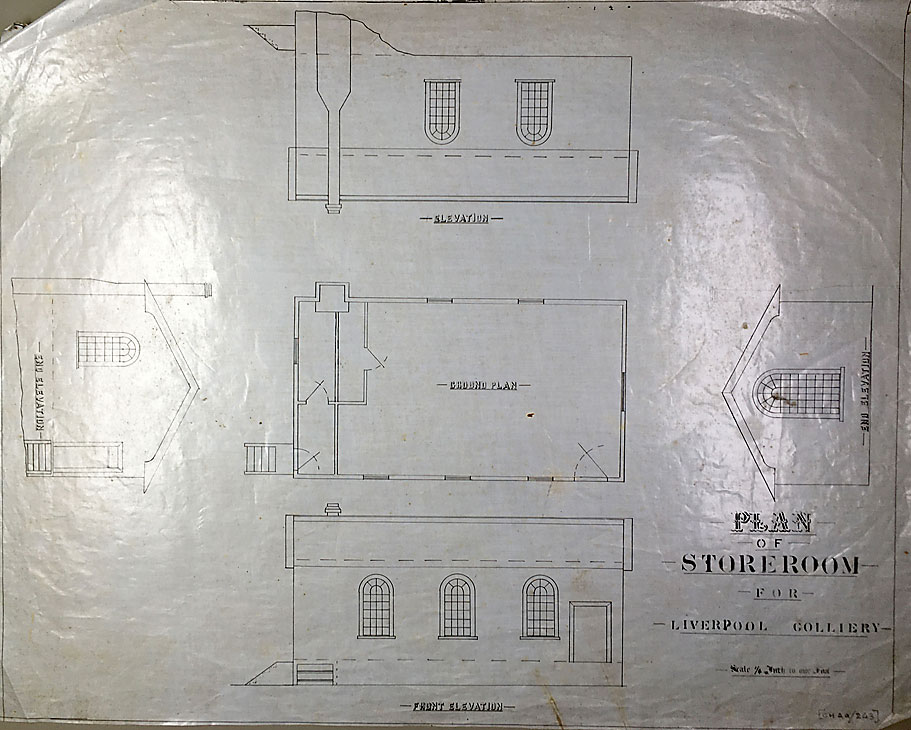
Store plan from Archives. A quick phone snap captured the salient points, but a good scan could have been had for a reasonable price had I needed it.
I did briefly wonder if the building was appropriate for my 1940 timeframe as the drawing is undated. My Facebook correspondents assured me it was, linen drawings like this tend to be earlier than 1940 (and it was filed with drawings from c1910), and the style (windows/construction) is very similar to a number of buildings up the valley at Middle Brake dating from around 1910. So a victory for research in the digital era? Yes, but ironically Trevor Corrin was visiting, saw what I was doing, and came up with a full package of images and dimensioned sketches he’d made some years ago for Colin Barry. Anyway, the result was that I had more than enough information to build the store.
The basis of a good model is typically a good deal of cogitation as to the methods and materials to use, together with the construction and finishing sequence. As part of that process I began a CAD model of the building. I needed to slice it obliquely and I was sure that some parts would be laser cut or 3D printed so a CAD model would be useful. In it’s rudimentary incarnation it allowed me to print a folded paper version to plonk beside the track to test whether the concept was sound.
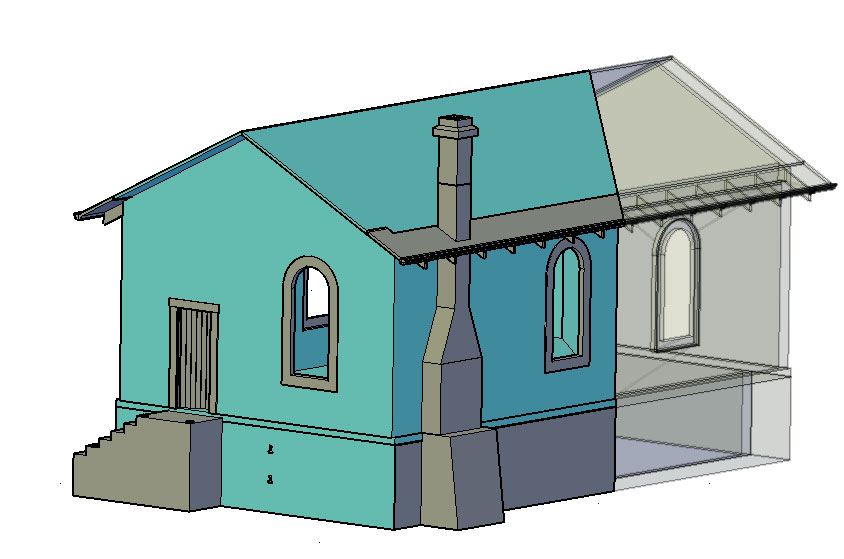
Basic CAD model of the store shown from the angle it will be visible on the layout. Blue parts modelled in styrene, grey parts as 3D prints. The window frames (not shown) are laser cut card. The transparent area is not modelled at all as the backscene runs through the building.
The building is cleanly plastered concrete (other than the foundations at the rear which are unplastered and show the imprint of rough timber shuttering). The window frames are intricate and the facings rounded, but otherwise the building is quite simple. The exposed rafter ends, soffits and guttering being the only details that posed something of a challenge. The walls are 6″ thick and I modelled them as a 1.5mm frame faced with 0.5mm sheet. This was easy to work accurately and allowed fine lapped joints at the corners. The window facings and doors are plug in prints. The foundation to the rear was modelled in Blender to allow creation of the timber shuttered concrete surface and 3D printed. The roof edge was also printed and incorporates the soffits/exposed rafter ends/guttering. Importantly it is also shaped to allow good fit and gluing surface to the main roof sheet as well as a substantial edge that clips behind the walls to provide positive location.
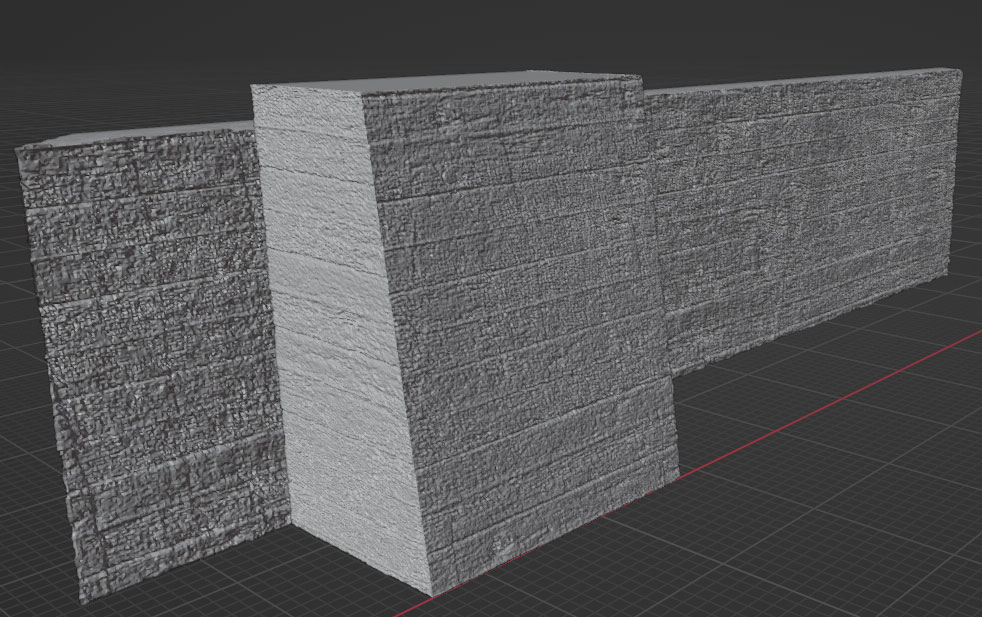
Digital model for the rear part of the foundation with plain timber shuttered concrete surface.
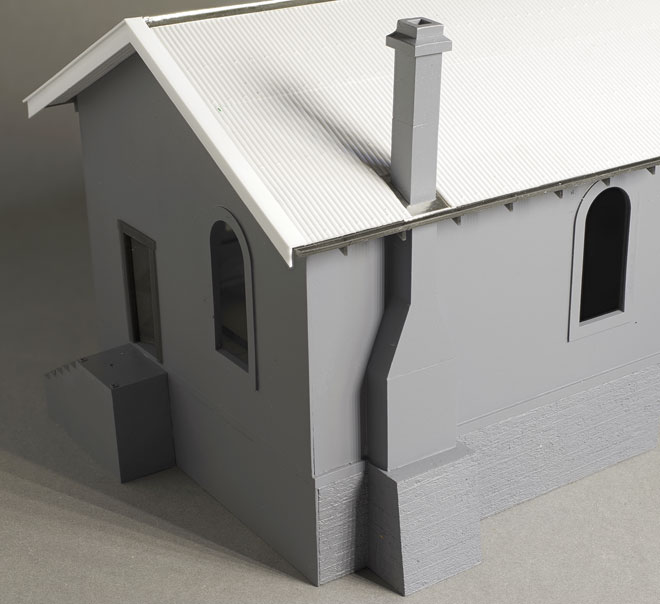
The building in progress. The major work is done with the concrete in primer grey. This is the only available view of the building for the public.
The concrete was painted by first doing an all over coat of acrylic with a lot of added talc to provide a bit of texture. A basically concrete colour applied with a piece of torn make-up sponge. Next various washes were applied to build up colour and variation. Some black wash to highlight internal corners, cracks and so on. Horizontal lime stains were drawn in with a watercolour pencil and then blended in a downward direction with a moist brush. I just kept referring to the photo above and kept working it until it got acceptably close, bearing in mind that my building was to be 50 years younger and in good condition. Not actually very difficult to do and very forgiving. There were one or two mis-steps, but these have been blended in to the overall effect.
Other colours were something of a guess. The wooden mine buildings of the period appeared to be a yellow orange colour with red/brown trim and roof. The doors show remnants of brown paint, so I went with a red roof and doors with cream/yellow soffits. Window frames in off white. It looks OK to me.
Window frames were laser cut in 0.2mm card at my local library (who provide a range of digital services for residents for the cost of materials). These were glued to printed internal reveals, painted and the glazing (Overhead transparency film) fixed from the inside with thin CA glue. Parts fitted well so it was all pretty easy going, just being careful to file/sand back any tightness to avoid distorting parts.
There’s a rudimentary interior with a bit of detail, but it cannot be seen. My only reason for adding it is to prevent the observer from seeing right through the building where this would be unprototypical.
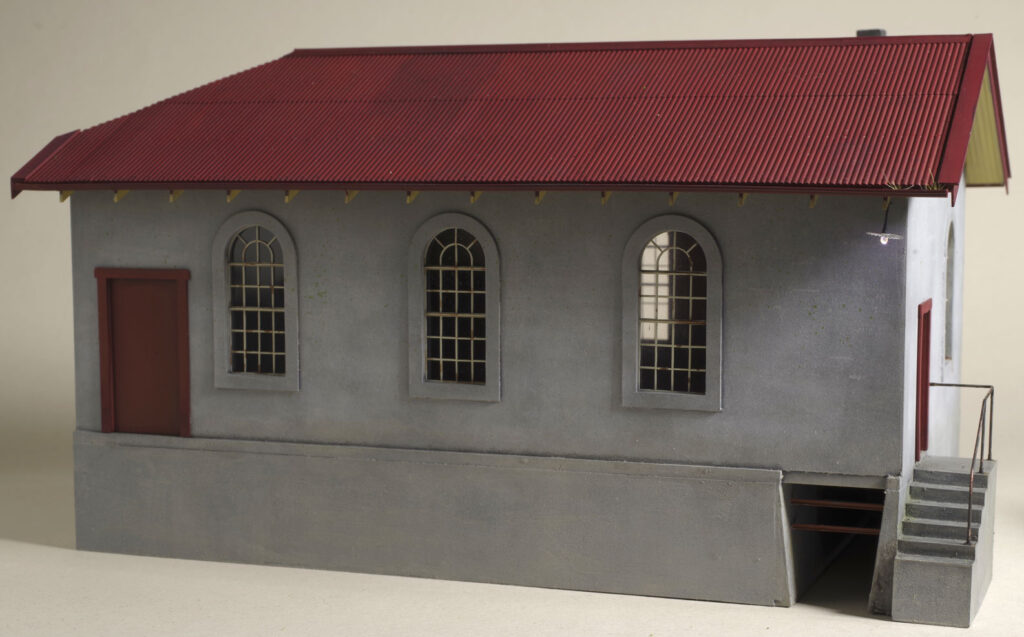
The usually invisible view from rail side. The building wil be bedded into the ground to the level of the bottom step.
I had no good information on the handrail, other than that it would have been necessary and there are the remains of the uprights and wall mount in some photos. I printed an extra set of stairs and modified these to act as a bending/soldering jig. The handrail is a confection fabricated from 0.8mm tube and 0.6mm wire. It worked first time and was relatively straightforward, although I did rework one of the joints where I was initially a bit heavy handed with the solder. I used brass black for the basic finish.
The lamp shade is one of those things I’ve looked at many times over the years. These were quite common and characteristic of the period, and while I’m not sure this exact fitting was used here it certainly might have been. I etched some shades years ago (and they still adorn the margin of my cabbage tree etch), but that’s not a particularly effective approach. This time around it occurred to me that I could print some press tools and form the shade from shim – which is what I did. A bit of a fiddle, but actually dead simple once the tools were on hand. The lamp itself is a small pre-wired LED modified by forming a ball of 5 minute epoxy around it. This not only hides the LED shape but serendipitously also modifies the light output to much better mimic an incandescent bulb. I don’t really need the lamp to operate, but it wasn’t really any more effort to do so, so I have that option.
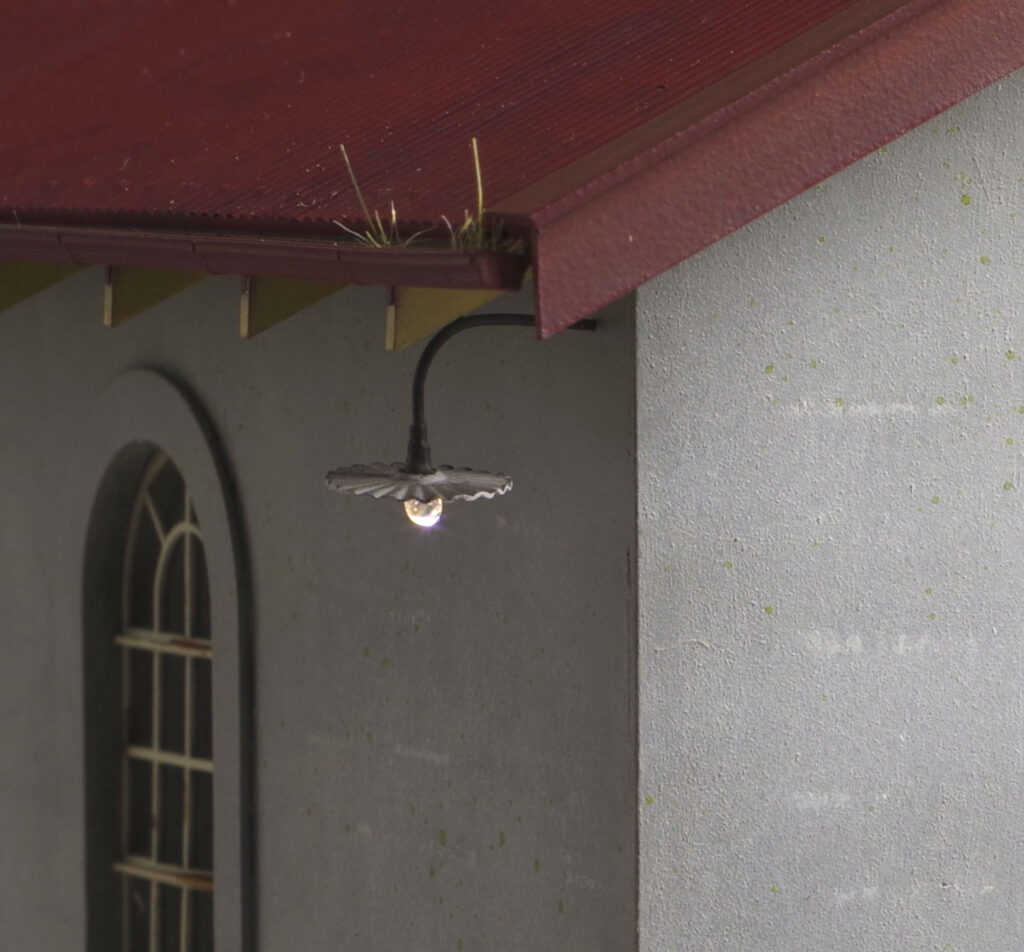
The lamp, barely illuminating the steps to the office.
The building will be right at the front of the layout so I’ve tried to make it as detailed as possible while hopefully avoiding any twee touches. Mirroring the original resulted in the chimney, office door and stairs being prominent which is more interesting that the plain corner at the other end of the building.
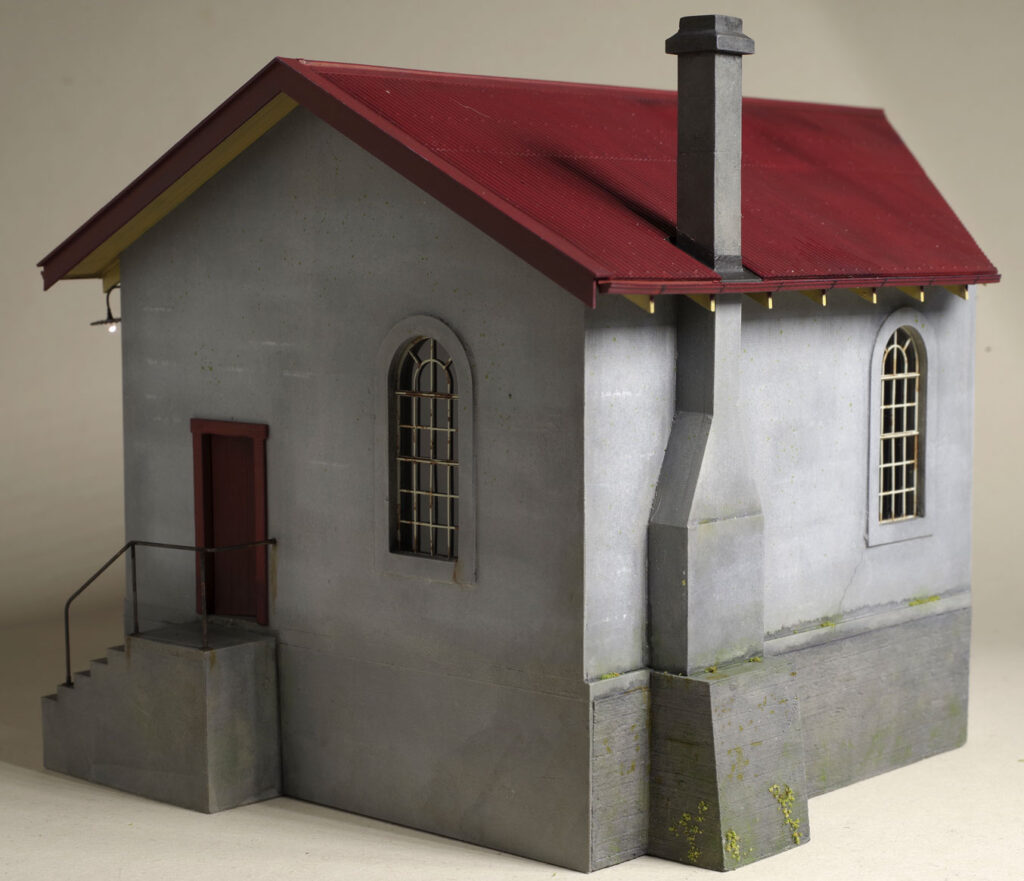
This is the ‘normal’ view from the front of the layout. The foreshortening of the building will be somewhat masked by a tree or two.