
In which your correspondent actually finishes something for a change, and the travails of doing so…
F154, my final test build for the F kitsets has been lingering at the point I typically get my models to before putting them in a box for ‘later’. I.e. all the soldering and construction done, but little of the finishing, painting and inevitable fettling needed to make them layout ready. My excuse for this is that I don’t currently have a layout at running stage and by leaving the finishing of all these models until later they will be fresh when the time comes.
On the other hand it is nice to finish things so here’s some notes that probably won’t be in any instructions:
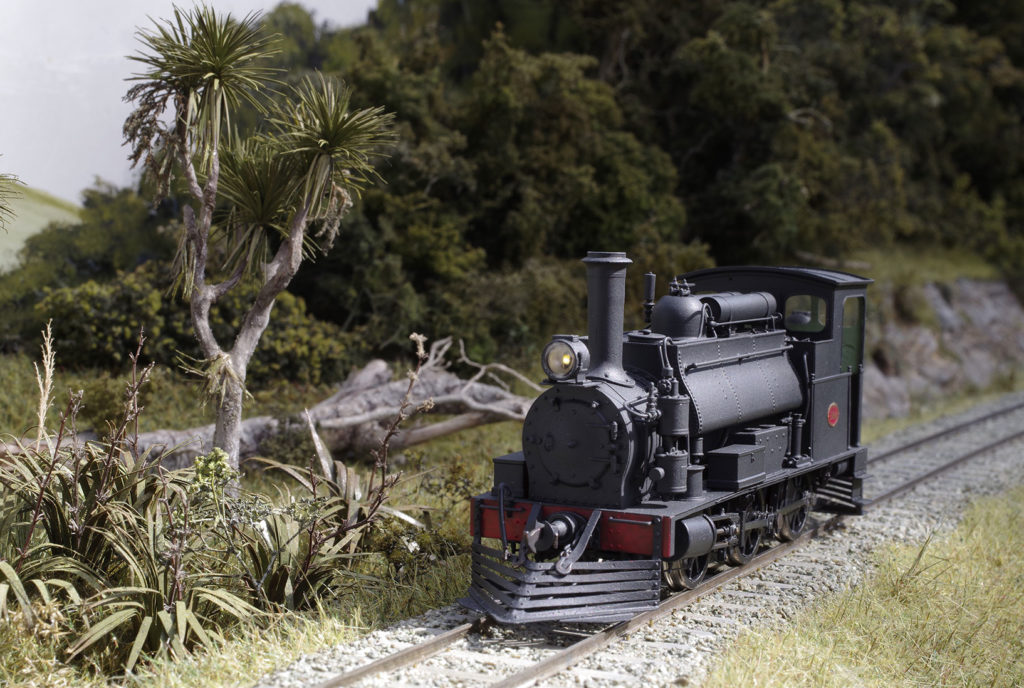
I’ve tried various incandscent lighting solutions over the years, but was quite keen to try some really small (0.8mm) pre-wired warm white LEDs. These are pretty nifty, being around the size of a scale light bulb and pre-wired with some really fine (0.28mm) multistrand wire. Available in the Emporium by the way. F154 has acetylene lamps. The castings for these are very fine but do not have a reflector. So the first task was to draw and print suitable reflectors with a nice void to take the LED, and a suitable hole for the wiring. These were silvered with a Molotow pen and fitted to the loco after painting. The LEDs were then carefully fitted and the wiring taken into the loco superstructure via holes drilled during construction. The LED bodies were nestled into their voids and secured with a dot of superglue. Lenses were made up from OHP transparency sheet using a punch into lead sheet (4.9mm diameter). The LEDs come with suitable dropping resistors (680 ohm) for use on 12-18V, but these generate a very bright light that is too much for an old loco lamp. The F kit has a board with mounting points for SMD resistors so after some trial and error I used 100K Ohm to generate a warm pale yellow output. Much higher than this and the LEDs won’t light at all, and some won’t even light at 100k – so 80k might be a better value to use for consistent performance. The photos were taken outside in bright sunlight. The lamps appear brighter under normal lighting.
All in all I’m pretty pleased. The size, colour and brightness together with the overall appearance are great. A circular source would be slightly better, although the rectangular shape is not obvious at the intended brightness.
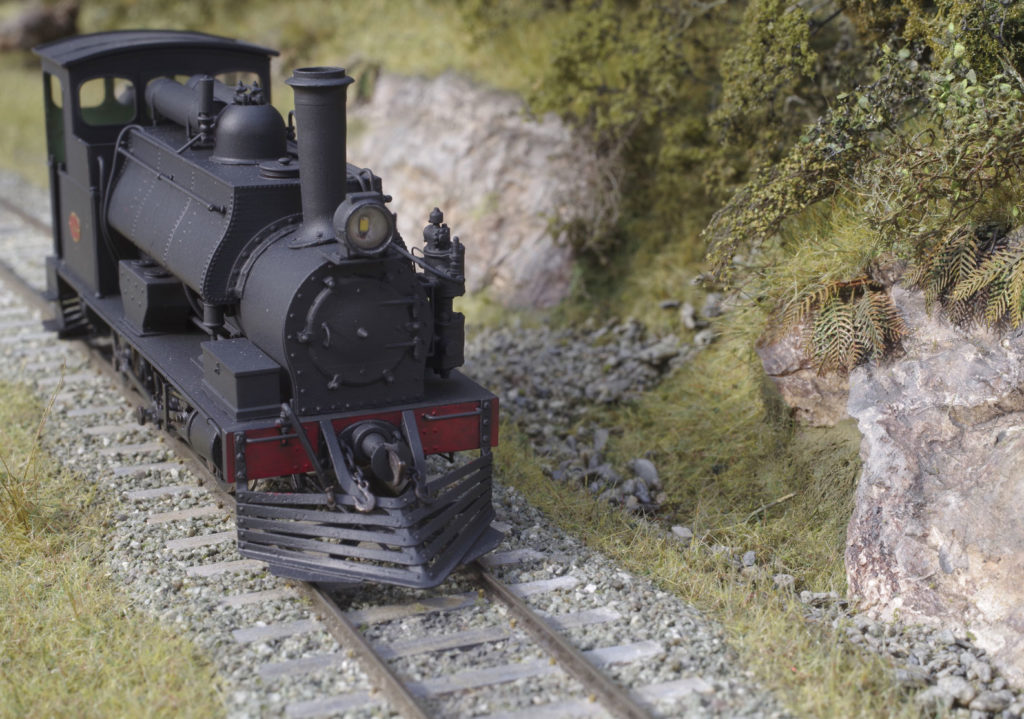
I didn’t fit the side chains during the build – perhaps thinking that they might complicate painting. While that may be true (debatable) trying to fit them after finishing was a pain. Not so much difficult, as just incredibly fiddly and time-consuming with lots of bits for the vacuum cleaner to suck up later. The air hoses worked nicely though. Cocks and gladhands are cast, while the ‘hose’ is a length of black teflon tubing. The tubing is soft and doesn’t get in the way, while the castings are ridiculously detailed. The gladhand couplings are particularly nifty.
Fitting everything in: This baby is tight. Weight, motor, gearbox, speaker, decoder, lighting, wiring for everything all hidden away within the prototype outline. Provided you hold you lips right it all snuggles in nice an’ cosy but there isn’t any spare room.
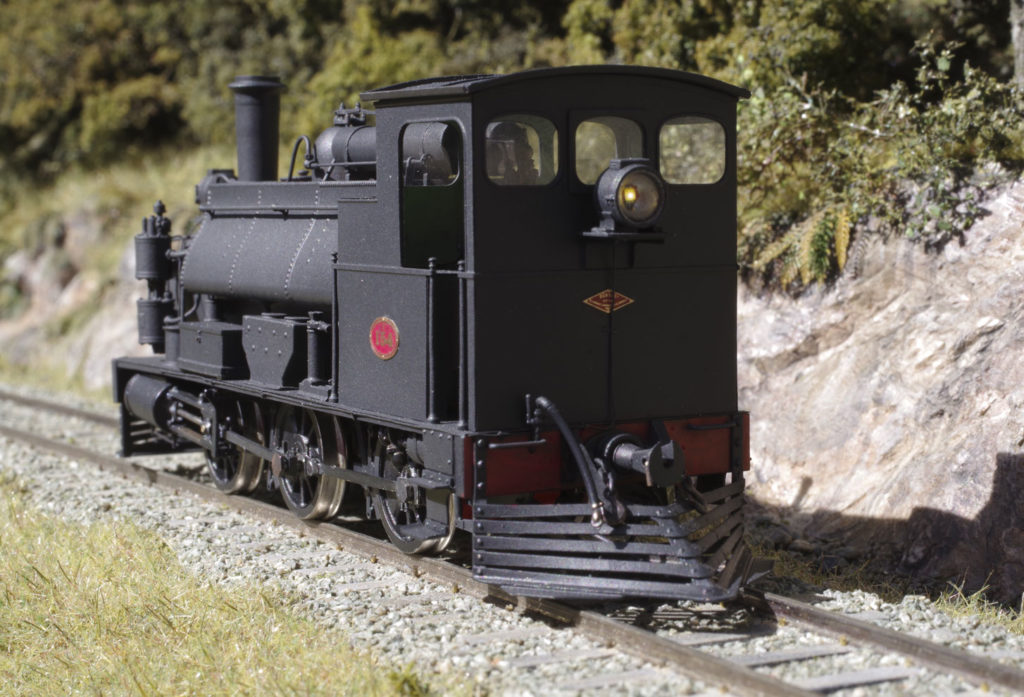
It isn’t that obvious in the photos, but all of the windows are glazed. The etched cab has slots to fit the glazing. As a result it is both extremely quick and easy as well as being incredibly effective.
Pickups. I haven’t done pickups for a while – preferring metal wheels, split axles and split frames. However there are two issues with this loco. Firstly it has plastic wheels, so something is needed. It has metal brakes, the rods touch the tires occassionally and so on, but it needs pickups. Secondly, it has ball bearing races and picking up through these alone is probably not great practice, plus there is definitely some evidence that DCC performance is not great if you do rely on current collection via ball races. The kit footplate PCB has tracks on either side that allow strip to be soldered under the footplate to bear on the tops of the tires. This is easy to do and works well (but more on this below). The finished loco is not fitted with a stay alive, but creeps along at less than 2rpm at the wheels on speed step 1. It will also climb over 0.5mm plastic objects on the track without stalling, so pick up is effective and it shouldn’t struggle at any baseboard joins or dead frogs it may encounter.
I made up some 3D printed masks, suitably tapered to be a nice fit on the wheels. These worked well, but I omitted to roughen up the nickel plating and the paint didn’t stay on too well. I remedied this somewhat by blackening the shiny spots with gun blue. Next time I’ll blue the tires far earlier in the process.
Final mechanical tuneups are always a bit painful in my experience. Typically they involve going backwards to go forwards and sometimes a little rework is called for. I typically experience a little crisis of motivation at ths point. In practice, though a little patience, careful observation and gentle tweaking generally gets me there. I find looking for bright spots (indicative of things touching where the shouldn’t) and gentle probing to work out which component is tight sorts things relatively quicky. 154 proved quite difficult though. there were a few little issues easily sorted but towards the end the chassis was silky without the body and gearbox but had a real tight spot when assembled. Eventually I worked out a pickup was riding on a flange. A quick tweak to line them up with the treads and problems solved.
I’ve never really got under the hood with DCC. I’ve used it, troubleshot layouts that have it fitted and read a lot of posts on the subject, but not actually had to get much into tweaking CVs. With the F that wasn’t going to continue. Peter Ross came around and loaded a nice suitable sound file into the decoder, and changed the loco number, but running was pretty average. Mechanically it was OK – so turned to ‘Motor Control’ in the manual. This is a LokSound Micro V4, and there are a few pages on the subject covering 6-7 CVs. The motor is a coreless wonder from China – Not something explictly covered in the list of motors commonly encountered in Germany. So first step was to do an Auto Tune. Press the appropriate buttons, the loco goes flat tack for nearly a meter, stops dead and gives a cheerful little whistle toot. Which I take to indicate success – whatever that means.
Reading back the CV values on a programming track it was clear that the decoder felt the little Chinese motor was quite different to anything offered by Marklin, Roco or Faulhaber. It certainly settled on CV values quite different to those listed as typical. Running was a bit better, but still not great. I played with a few settings, but the evential answer was to reduce the rotor inertia CV55 to 10 or less. I may play further for interest’s sake, but running is now extremely good.
Final result was a loco that will creep along at less than 2rpm (that’s very slow). It has heaps of torque and spins the wheels easily. Pulling power will depend on how much weight you can pack in, but should be very good.
There’s nothing like a photo so show what remains to be done, and I notice I haven’t refitted the brake rodding here. There’s the odd paint touch up needed, crew to install and a few other bits and pieces. The prototype picture I based the model on had furled canvas sheets above the doors and hungry boards to increase coal capacity on the cab floor. These will be nice to fit, and a bit of weathering would also enhance. I’ve presented the loco at this point though as in this condition it can be built out of the box (depending on what you want in your box anyway).
The F kits should be in the Emporium soon, but I’m currently negotiating sales via email. ‘Negotiating’ as the contents of the box differ somewhat depending on your locomotive of choice. If this sounds interesting please get in touch.